In YUMA solutions, the term category refers to a group of menu items with similar properties (such as salads, drinks, etc.). This topic helps you use and manage the Categories list.
View the Categories List
To view a list of categories
- In the left pane of Back Office Management console, expand the Items List node, and click Categories List.
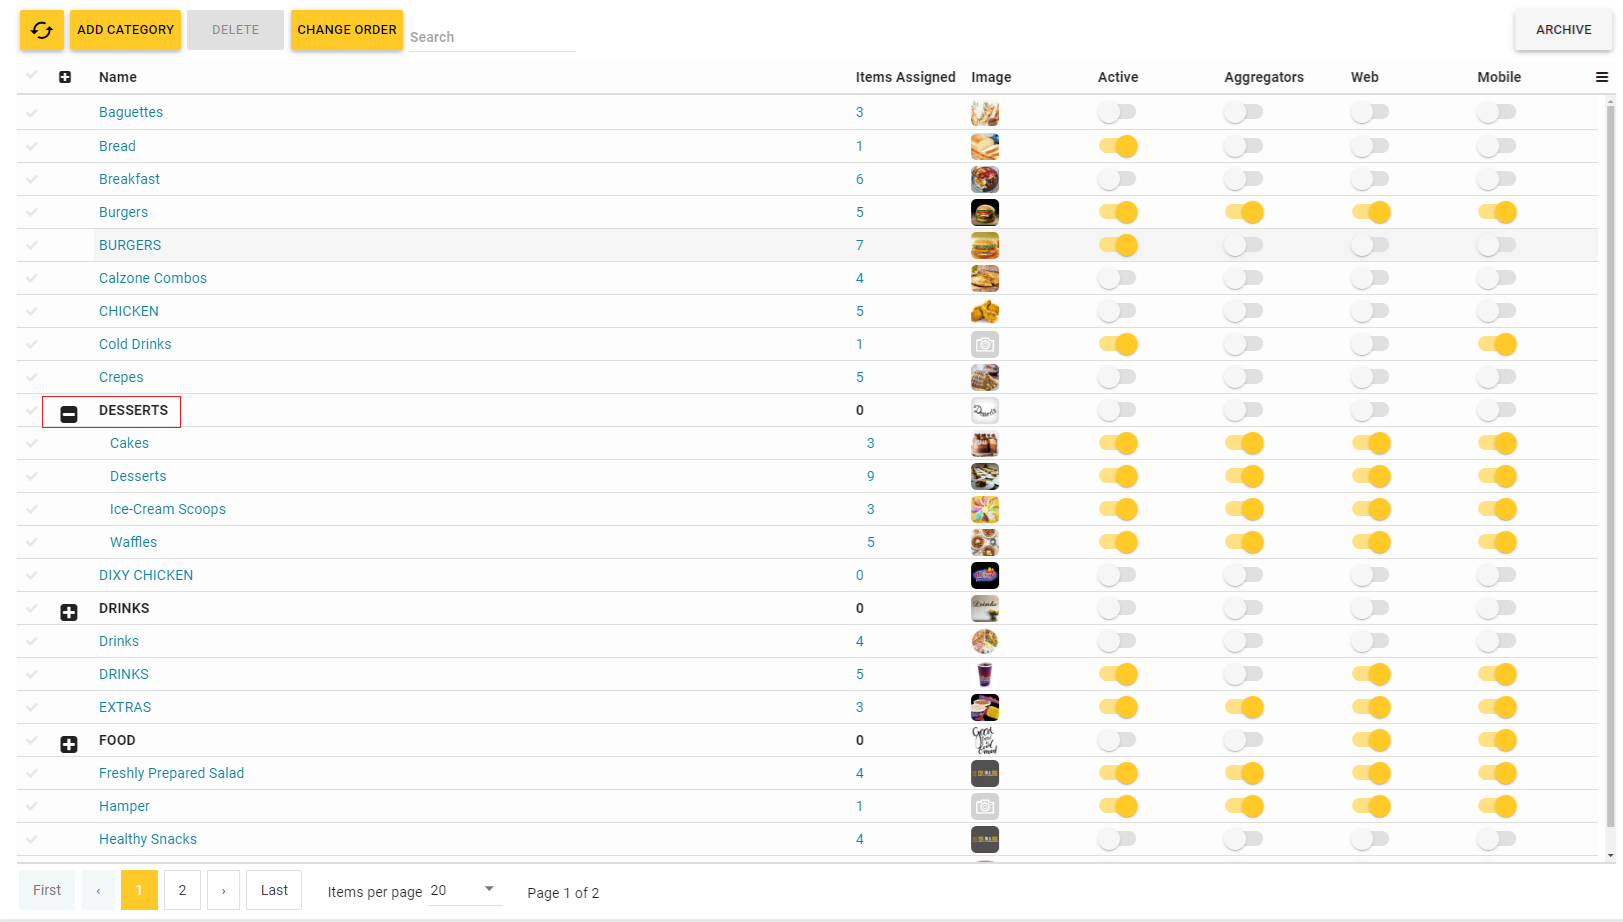
Note: In this list, the plus (+) icons mark root categories that contain child subcategories. To expand a root category, click
. To clarify, see the Desserts category in the above screen.
On this page you can do the following:
- add new categories
- edit existing categories
- delete categories
- manage the order of the list elements
- configure the category availability in the Customer Mobile app, store web site or aggregators. To do so, turn on appropriate toggle buttons in the Mobile, Web or Aggregators columns, respectively.
Add New Category
This section explains how to add new menu category to the Categories list.
To add new menu category
- Click Add Category.
- Complete the Add menu category form that opens, and then click Save:

The Add menu category form defines the following elements:
- Name: specifies the category name (mandatory).
- Description: provides optional description.
- Root category: optionally, click this field and select the root category for newly creating subcategory.
- Active: specifies whether this category is active.
- Editable by Admins Only: when selected, the items from this category can be updated only by admins.
- Mobile Enabled: when ON, items from this category are available in Customer Mobile app.
- Web Enabled: when ON, items from this category are available in the store web site.
- Aggregators: when ON, items from this category are available for order in aggregators.
- [yellow bar]: allows you to set the days and hours (referred to as availability hours) when the category items are available for sale.
- Sort by: allows you to select the sort type for items from this category.
- Stores: specifies stores where this category is available.
- Course: specifies the course for items from this category.
- Printers: specifies the kitchen printer used to print out the orders with items of this category (for more information, see Kitchen Printers).
Edit Existing Category
To edit menu category
- In the Categories list, click a category to update.
- On the tabbed page that opens, navigate to the General tab (similar to the Add menu category form described earlier in this topic), and make appropriate changes.
- Click Update to save your changes.
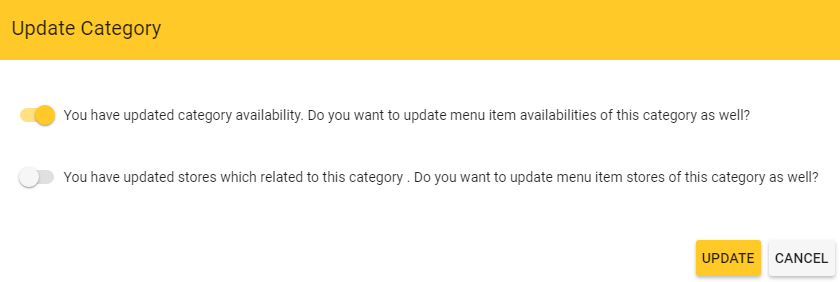
NOTE: If you updated the category availability hours or the list of stores where this category is available, Back Office displays the Update Category dialog box that lets you specify whether to propagate these changes to child items of this category:
For example, the settings of the above shown dialog box let you automatically update the availability hours for all child items of this category.
Delete Categories
To delete categories
- From the Categories list, select category(ies) to delete.
- Click Delete.
- When prompted, confirm the deletion operation.
IMPORTANT:
- Deleted categories are moved to Archive. To restore deleted items, click Archive, select desirable previously deleted category, and then click Restore.
- You cannot delete nonempty categories (the categories, which include at least one item).
Change Order of the Categories List
This section explains how to change the order in which categories are displayed in POS terminal, Mobile app or store web site.
To change order of the Categories List
- Click Change Order.
- Change the list order by moving selected categories up or down.
- When finished, click Save.
See also
 watch our help video about managing the Categories list: