This topic explains how to create the groups of general modifiers and assign them to your items.
NOTE: A modifier group must be created first before modifiers can be created.
View the Modifiers Groups List
To view the Modifiers groups list
- In the left pane of Back Office Management console, expand the Items List node, and click Modifiers Groups.
Back Office displays a list of existing Modifiers groups, if any:

This page defines the following elements:
- Add New: adds new group of general modifiers
- Delete: deletes selected groups
- Edit Positions: allows you to change the groups list order
- Search: allows you to search the groups list for groups whose names match the specified search key
- Active: when ON, makes an appropriate group active
- Mobile Enabled: when ON, makes an appropriate group available in Mobile apps
- Modifiers Assigned: displays the number of child modifiers in the group.
View Child Modifiers of a Group
The Modifiers Assigned column of Modifiers Groups list displays the number of child modifiers for each group. To view child modifiers, click the displayed number.
Create New Modifiers Group
To create new group of General modifiers
- In the Modifiers Groups list, click Add New.
- Complete the Add modifiers group form that opens, and click Save:
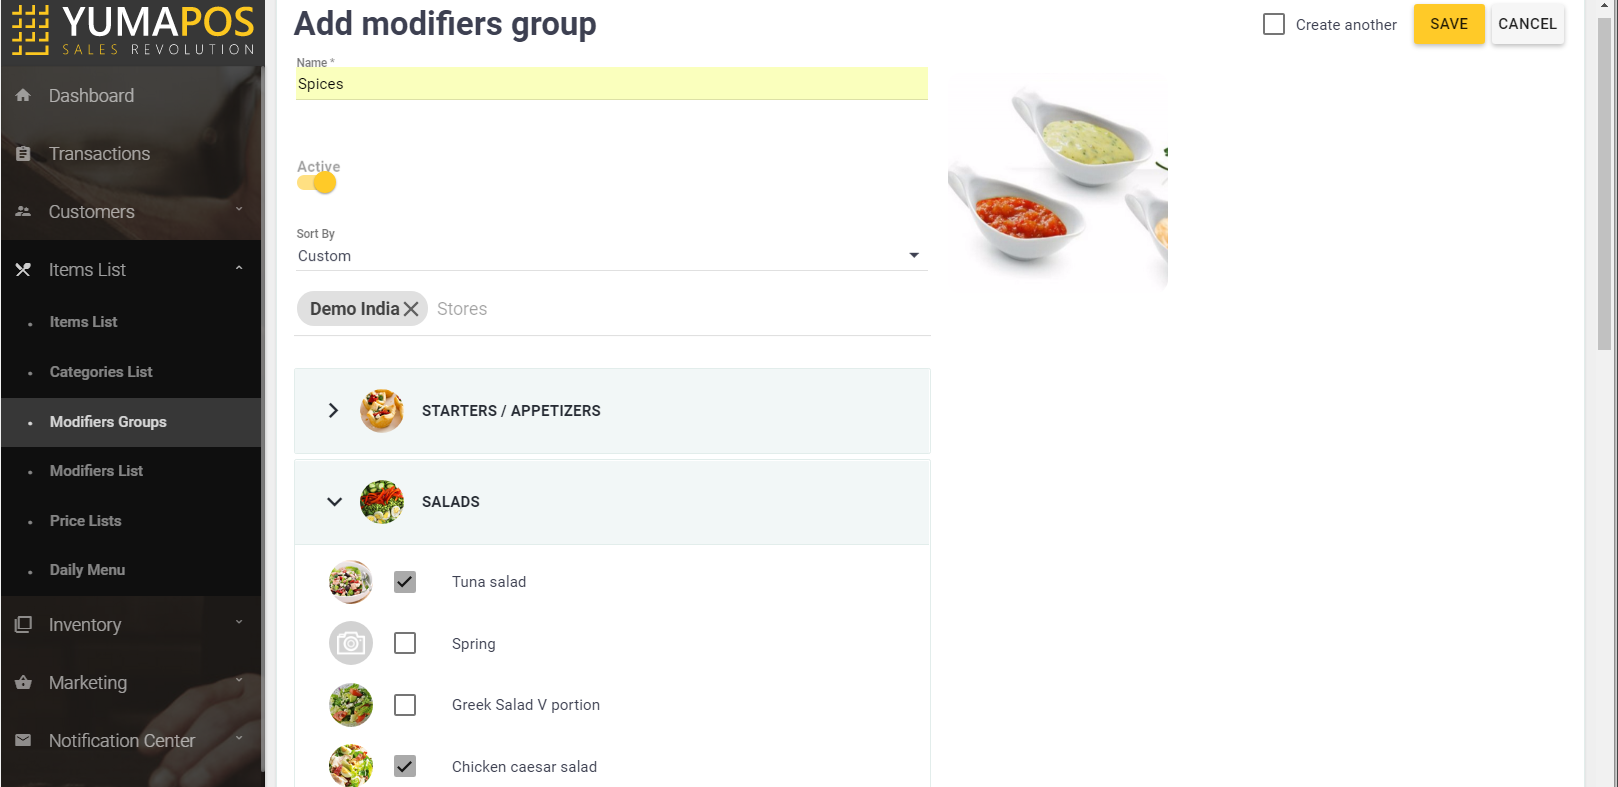
This form defines the following elements:
- Name: specifies the group name (mandatory)
- Active: when ON, makes this group Active
- Sort by: specifies the list sort mode
- Stores: specifies the stores where this group can be used
- [list of the item categories]: allows you to assign this group to your menu items. For details, see “Assign Modifiers Group to Menu Items” later in this topic.
Assign Modifiers Group to Menu Items
To assign all child modifiers of a modifiers group to your menu items, perform the following steps:
- Open the Modifiers Groups list, and click the modifiers group.
- On the page of the group properties that opens, go to the list of menu categories (beneath the page).
- In the categories list, expand category nodes and select checkboxes next to desired items:
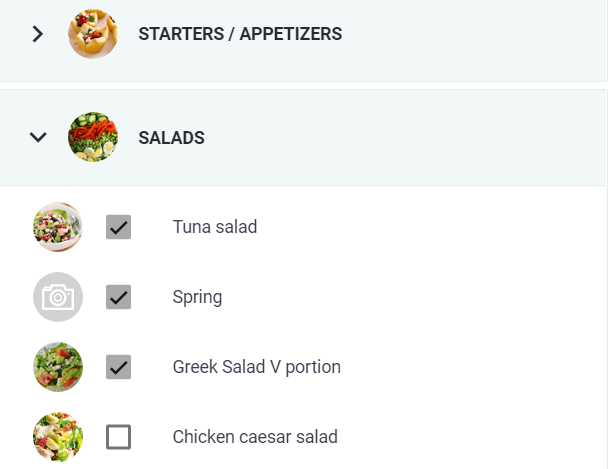
This screen illustrates how to assign all modifiers of the selected group to the following items from the Salads category: Tuna salad, Spring, and Greek Salad V portion. - Click Update to save your changes.
Delete Modifiers Groups
To delete the groups of modifiers
- From the groups list, select group(s) to delete, and click Delete.
- When prompted, confirm the deletion operation.
IMPORTANT: Before deleting a group, you should first delete all its child modifiers; otherwise, Back Office returns the following error message: “Some groups are not deleted. They have some modifiers items.”
TIP: For information on how view child modifiers, see the section “View Child Modifiers of a Group” earlier in this topic. For information on how to delete modifiers, see “Delete Modifiers” in Modifiers List.
Change Order of the Groups List
To change order of the modifiers groups list
- Click Edit Positions.
- Change the list order by moving selected group up or down.
- When finished, click Save.
See also