About This Feature
Imagine that you want to move your site to the YUMA platform and continue using your existing domain. In this scenario, the addresses (URLs) of some pages of your site might change. For example, a URL of page designed for ordering a particular item can change in the following way:
| Old URL | New URL |
| https://yourshop.com/product12 | https://yourshop.com/f3a09963-309e-4a41-9dff-ab53a2f7163912 |
Attempts to open the page using old URL results in the 404 error. The search engines (such as Google) updates their databases with 2-4 weeks delay, and the users might encounter outdated URLs during this period. This issue leads to traffic loss and may have a negative impact on your company reputation.
In this case, it is recommended to configure a redirection to new URLs (so called Permanent Redirect 301).
This redirection can help you:
- provide users with reliable access to the relevant pages;
- maintain your site position in search results;
- minimize traffic losses and avoid negative impact on SEO.
This topic helps you configure redirection with the Website Relocation feature.
Configuring Redirection of Your Site Pages
To configure redirecting some URLs of your site, complete the following steps:
- In the left pane of Back Office Management console, expand the Settings node, and then click Website.
- Navigate to the General Settings, and then click SEO.
- In the SEO settings window that opens, click Website Relocation:
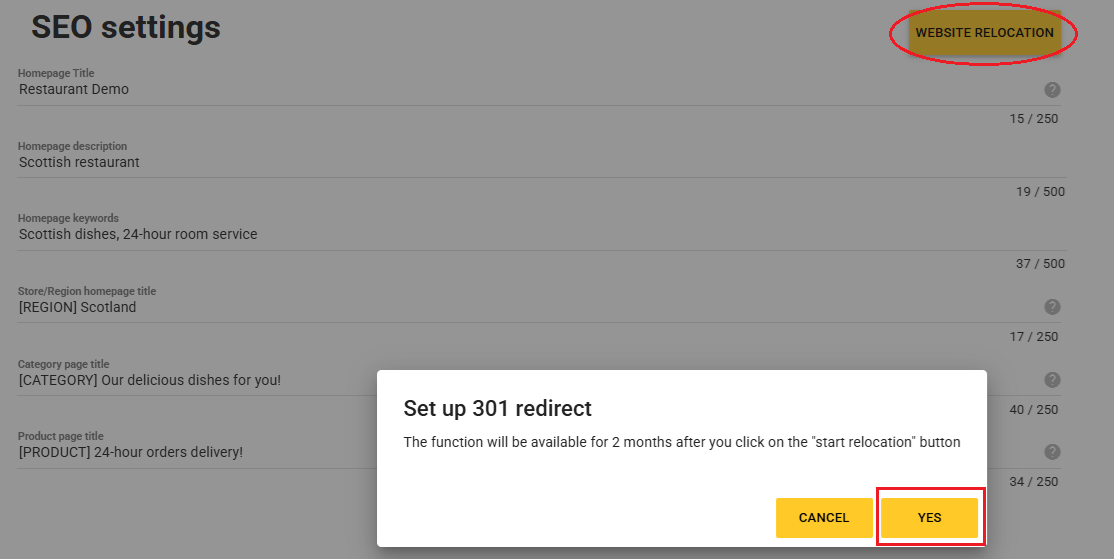
- To start configuring redirection, in the Set up 301 redirect popup window, click Yes.
The Website Relocation page (see later) opens.
Important: After you clicked the Start Relocating button (see Step 6), the site relocation functionality is available for 2 months.
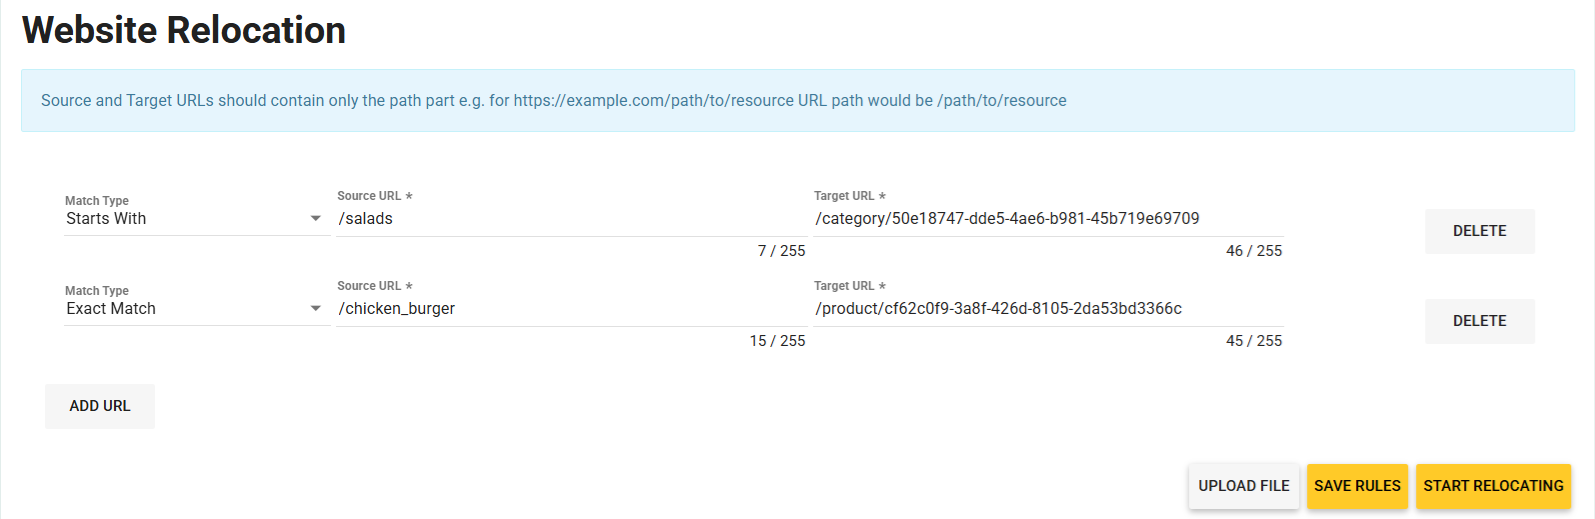
- On the Website Relocation page, configure the redirection rules in the following way:
- From the Match Type list select Exact Match (for redirecting only URLs with exact source URL) or Starts with (for redirecting all URLs that start with specified URL).
- In the Source URL text box, enter a part of old URL that goes after the domain name.
- In the Target URL text box, enter a part of new URL that goes after the domain name (to clarify this, see example later in this topic).
- To add another line with redirection rules, click Add URL.
Note: You can add up to 100 redirection rules.
- Alternatively, you can import redirection rules from a CSV file: click Upload File, and then select the CSV file to upload.
File format: <Source URL>,<Target URL> comma separated pair. One pair per a line.
- To enable URLs redirection, click Start Relocating.
To save your relocation rules, click Save Rules.
Example of URL Redirection
To clarify the use of this feature, consider the following example.
Scenario:
Before moving your site to the YUMA platform, at your store web site, a page for ordering Mexican Chicken Wrap has the following old URL:
https://demo-shop.yumapos.co.uk/mexican_chicken_wrap
After you have moved your site to the YUMA platform, this site is similar to the following screen:
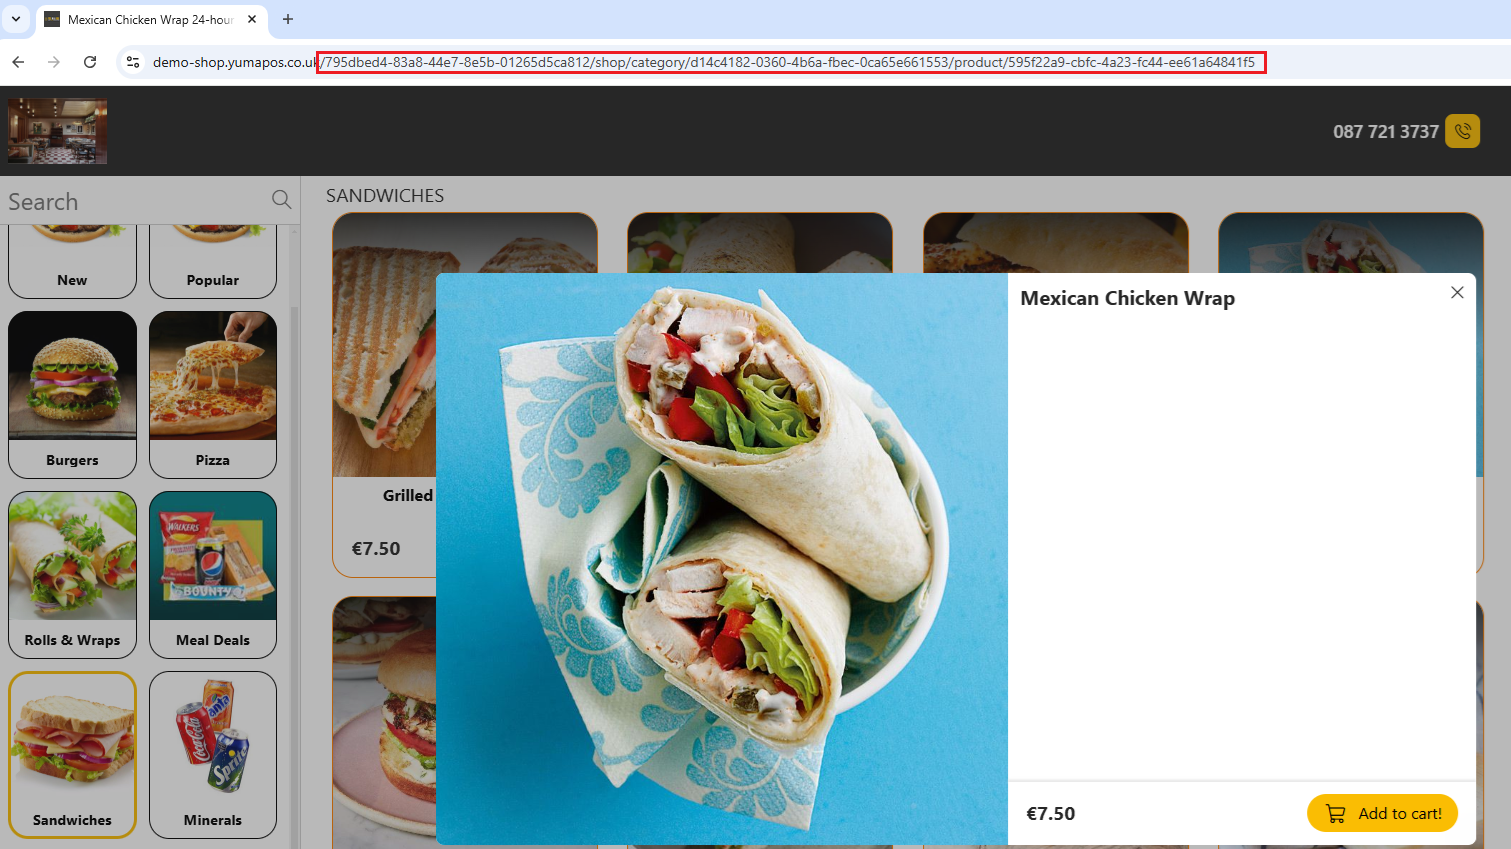
New URL:
https://demo-shop.yumapos.co.uk/af6d8110-1f98-49e7-d681-ae18dfd6f382/shop/category/6e6417df-c5e2-47f5-8c7f-5c5f60efe5f6/product/282dcf30-f0f8-4a7e-9e77-049c9bb8503f
In this example, the URL parts that must be inserted in the Source URL and Target URL fields (see Step 4-5) have red color.
Important: The URL parts start with / (the slash character).