The YUMA back office allows you to charge your contractors for services, shipment of goods, etc.
View List of Invoices
To view a list of all registered invoices
- In the left pane of Back Office Management console, expand the Finances node, and click Invoices.
Back Office displays a list of invoices similar to the following screen:
In this list, each entry has the following fields:
- Account number: account number (automatically generated by the system).
- Created: date and time of the invoice creation (local time).
- Amount: invoice amount.
- Status: displays the status of the account (the green icon means the account is paid and closed).
TIP: To view deleted accounts, click Archive.
Available Operations
On the Invoices screen, you can perform the following operations:
- Filter the invoices list: you can use the toolbar at the top of the screen to filter the list of invoices by vendors and billing dates.
NOTE: The period of time can be selected in the drop-down list on the right (for example, you can select invoices for today, yesterday, this month, etc.). - Remove invoices: from the invoices list, select invoices to delete, and click Remove.
- Get paid for invoices: click
 next to an invoice to get paid for that invoice— for more information, see Get Paid for Invoice later in this topic.
 - Issue new invoice: click New Invoice — for more information, see Issue New Invoice later in this topic.
Get Paid for Invoice
To get paid for invoice
- Find an invoice for payment on the invoices screen (see View List of Invoices earlier in this topic).
- In the Status column, click next to the invoice.
The system opens the Receive Money by invoice dialog box similar to the fllowing screen:
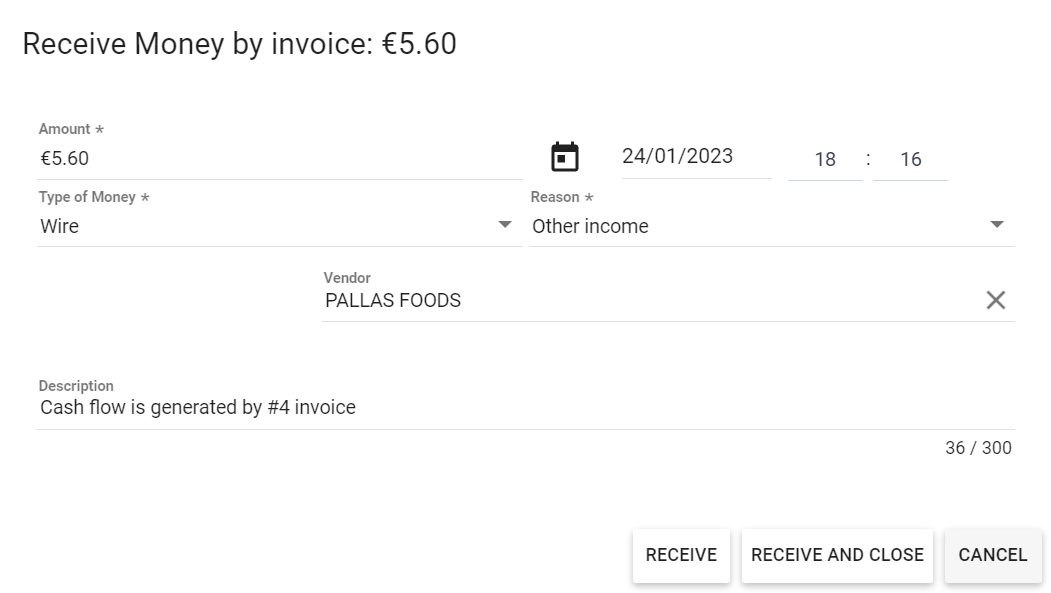
- Complete the following fields (mandatory fields are marked with asterisk *):
- Amount*: payment amount .
- Type of Money*: select the payment type (Cash or Wire);
- Reason*: select an accounting item (payment reason).
- Vendor: select a vendor.
- Description: enter the operation description or use default description.
- Click Receive (receiving payment) or Receive and Close (receiving payment and closing the invoice).
Issue New Invoice
To issue new invoice
- On the invoices screen, click New Invoice.
The system opens the Invoice dialog box similar to the following screen:

- Complete the following fields (mandatory fields are marked with asterisk *):
- Created: Invoice creation date (by default this field is automatically set to current date).
- Due date: set payment deadline.
- Vendor: select a vendor to which you send the invoice.
- Reason*: select an accounting item (payment reason).
- Invoice items: contains a list of items (such as menu items, inventory items or other items) that are delivered to vendor according to the invoice. To add items to the list, use the following icons:
 — adds menu item;
 — adds inventory item;
 — adds any item.
- For each added For each item added, set the unit price and quantity in the Price and Quantity fields, respectively.
Invoice amount is shown next to Total. - Click Add.
NOTE: Use the icon
to remove items from the list.