YumaPOS Back Office relies on role-based control to enable fine-grained access management for your staff members. For example, you can create the “cashier” and “waiter” roles with different rights. This topic covers the following questions:
- Viewing and managing a list of roles
- Configuring roles
- Assigning roles to your employees
Viewing and Managing a List of Roles
View a List of Existing Roles
Back Office allows you to view a list of existing roles. The control elements of this list allow you to add new roles, delete existing roles and restore previously deleted roles.
To view a list of roles
- In the left pane of Back Office Management console, expand the Staff node, and then click Roles:
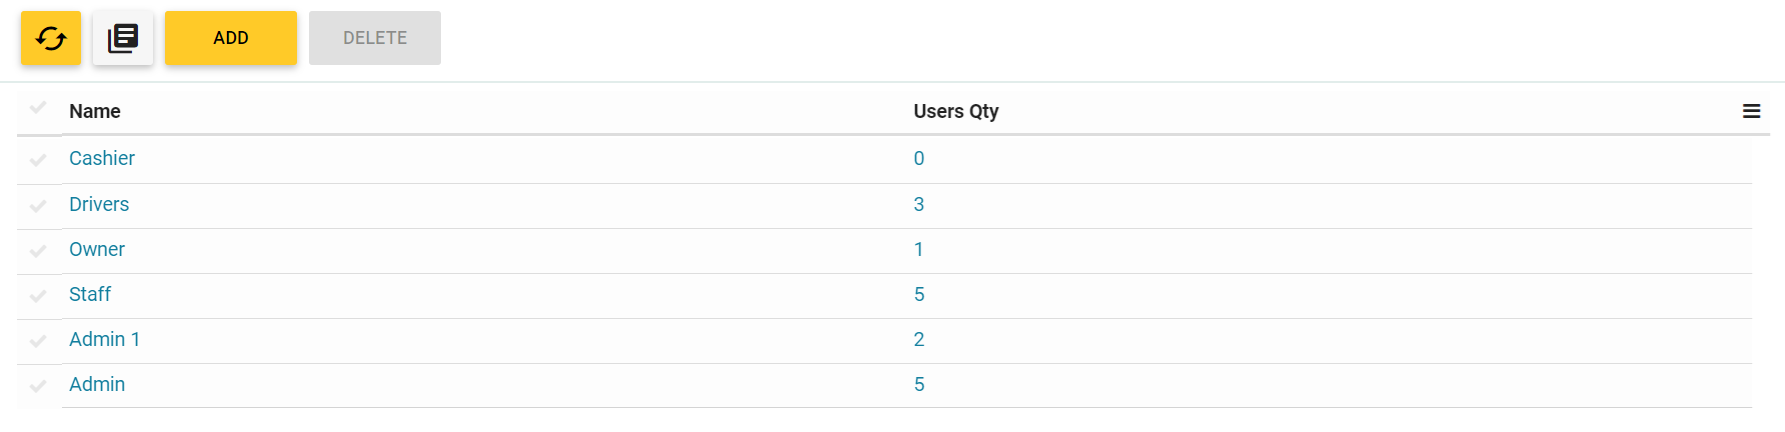
In this list, each item includes the following fields:
- Name: displays the role name
- Users Qty: displays the number of employees that belong to this role. To view a list of employees that have this role, click that number.
About the Admin Role
The list of roles always includes the built-in role Admin. The employees with the Admin role have full control over Back Office and all registered stores.
NOTE: You cannot delete the Admin role or edit its permissions.
Manage a List of Existing Roles
To manage the list of roles, use the following elements:
 : click to view a list of deleted roles;
- Add: adds new role
- Delete: deletes selected roles
- Deleted Roles: restores deleted roles.
To add new role
- Click Add.
- In the Add Role form that opens, specify the role name and permissions (rights) to assign to that role.
- When finished, click Save.
NOTE: For information on how to assign permissions to a role, see Configuring Roles later in this topic.
To delete roles
- From the Roles list, select roles to delete, and then click Delete.
NOTE: You cannot delete roles assigned to employees. Before deleting a role, remove the role from the Roles list of each employee to which this role has been assigned. For related procedure, see the “Set up a Staff Member Profile” section in How to Add New Staff Member.
To restore deleted roles
- Click .
- From the list of deleted roles that opens, select roles to restore and click Restore.
Configuring Roles
After adding new role, you should specify all appropriate settings for that role. The settings define a set of rights that depend on duties associated with that role. For example, the role “Cashier” should allow the cashiers to access POS Terminal application and Cash Drawer. In addition, you can specify whether to let the cashiers void orders or remove items from the order.
To configure a role, in the list of roles, click the role, and then configure appropriate settings on the Sections, Functions and Salary tabs as described later in this section.
NOTE This section explains how to configure the Cashier role. However, you can complete similar steps to configure other roles.
Configure Settings on the Sections Tab
This tab allows you to configure the rights of access to certain sections of activities.
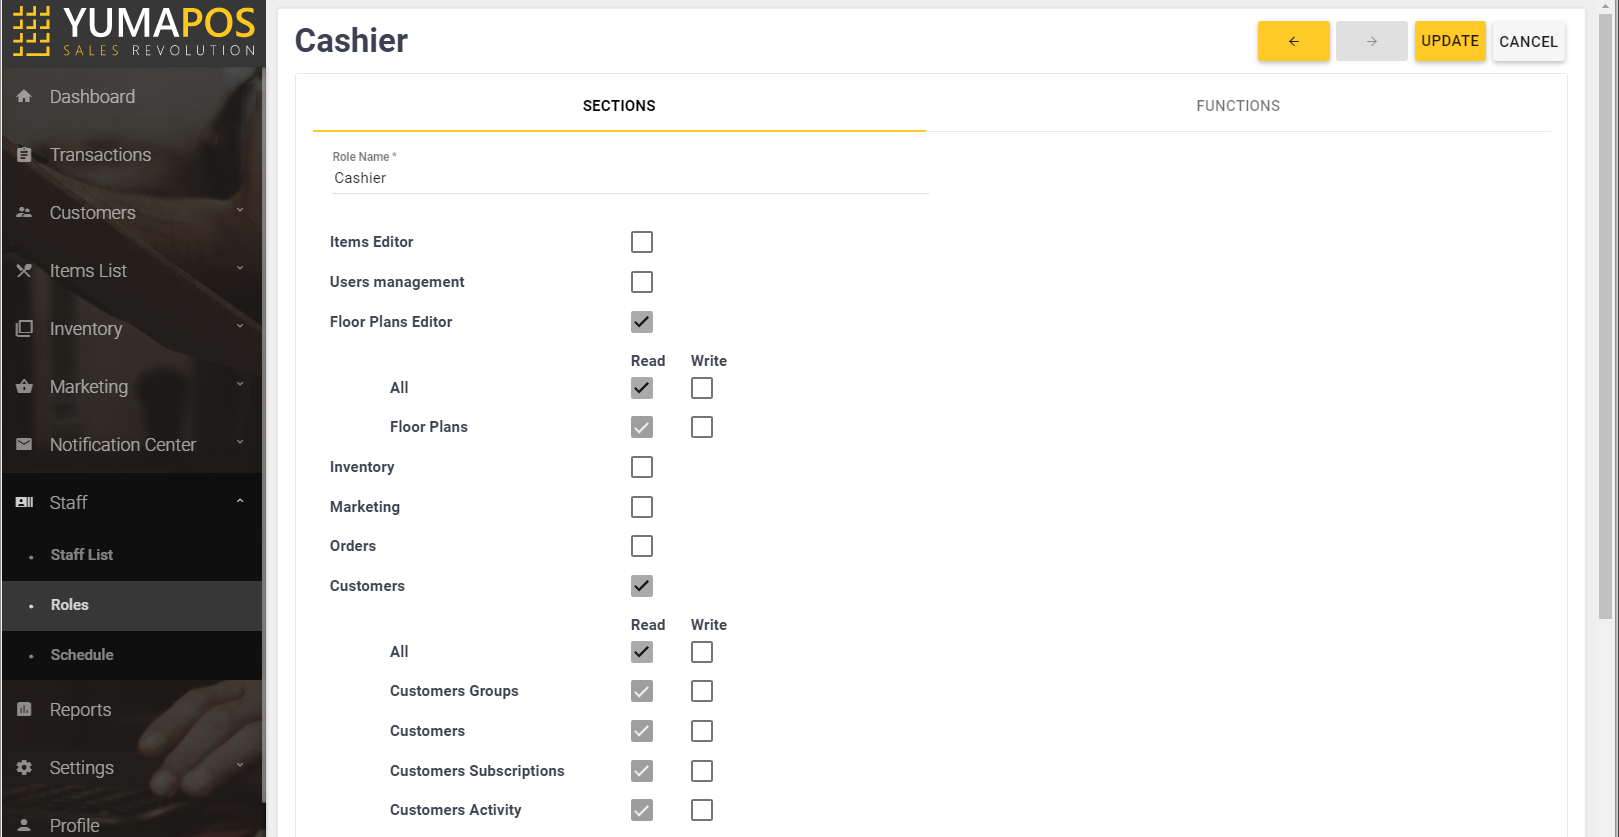
To configure access rights
- Select check boxes next to a section name.
- Specify the Read and Write rights for that section.
- When finished, click Update to save your changes.
In this example, employees with the Cashier role have the right to read the following items:
- Floor Plans
- Customer information, such as, the customers list, customer groups, etc.
Configuring Settings on the Functions Tab
This tab allows you to specify functions available for employees with this role.
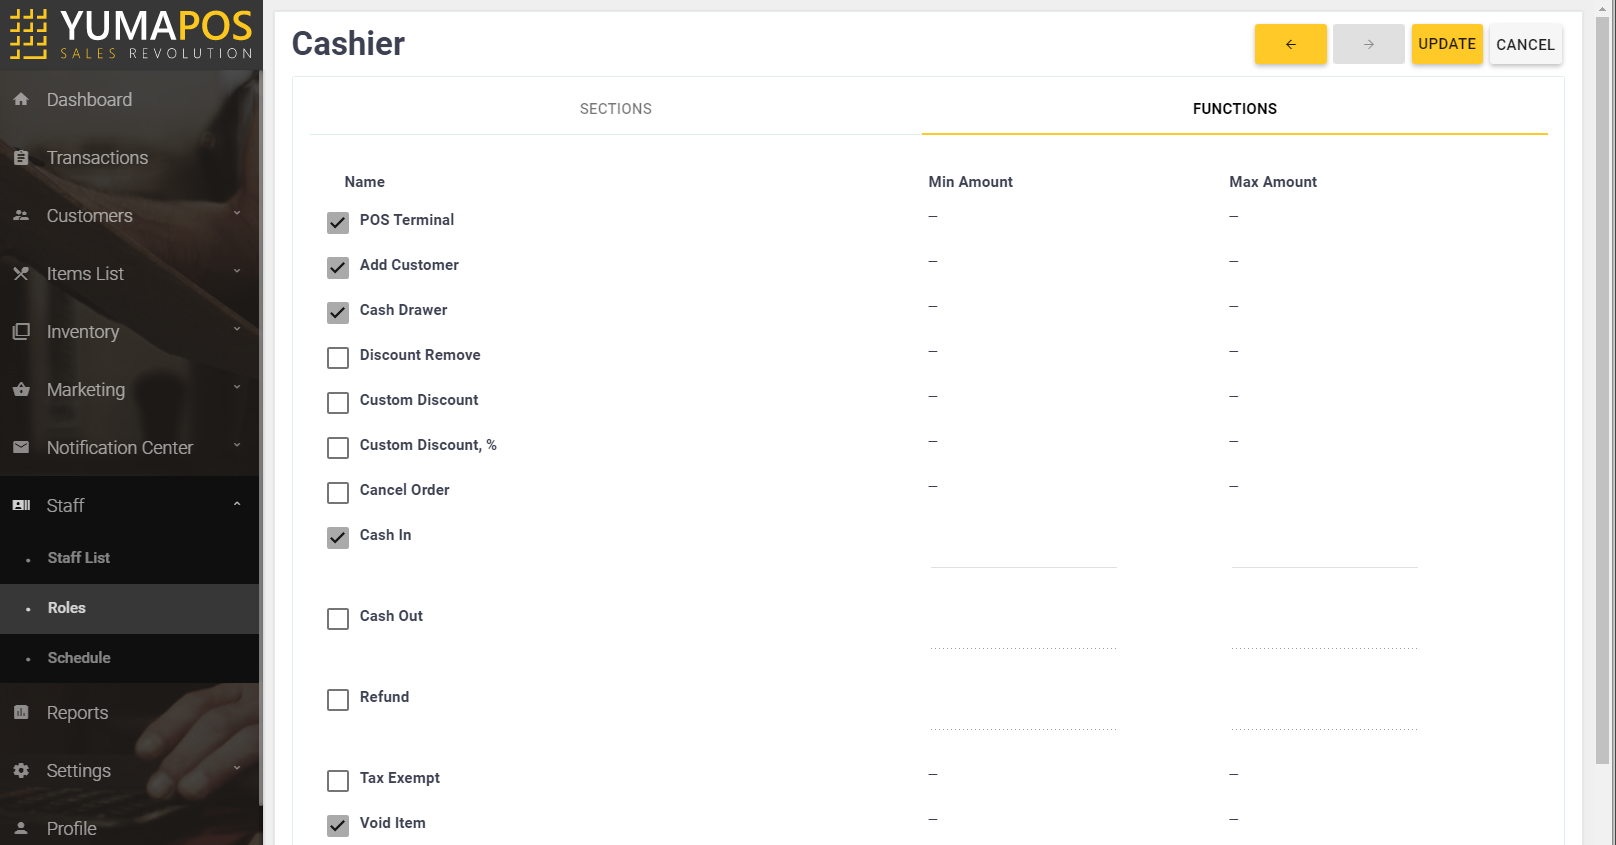
To configure the role functions
- Select check boxes next to functions to enable.
- When finished, click Update to save your changes.
In this example, employees with the Cashier role have the right to:
- work with POS Terminal
- work with the cash drawer
- cash in
- void items
- add customers to the Customers list.
Assigning Roles
To assign created roles to your employees, use the Roles tab of an employee personal profile. For detailed instructions and samples, see “Set up a Staff Member Profile” in How to Add New Staff Member.