This topic explains how to apply or unapply inventory documents.
Overview
Applying document — means recording business events, described in the document, in YumaPOS database. For example, applying an Act of transfer, which describes a transfer of inventory items from Location 1 to Location 2, results in a decrease of the volume of stocks at Location 1. At the same time, the volume of stock will be increased by the same value at Location 2.
Unapplying document is an opposite operation that voids changes made to YumaPOS databases after applying the document.
How You Can Apply or Unapply Documents
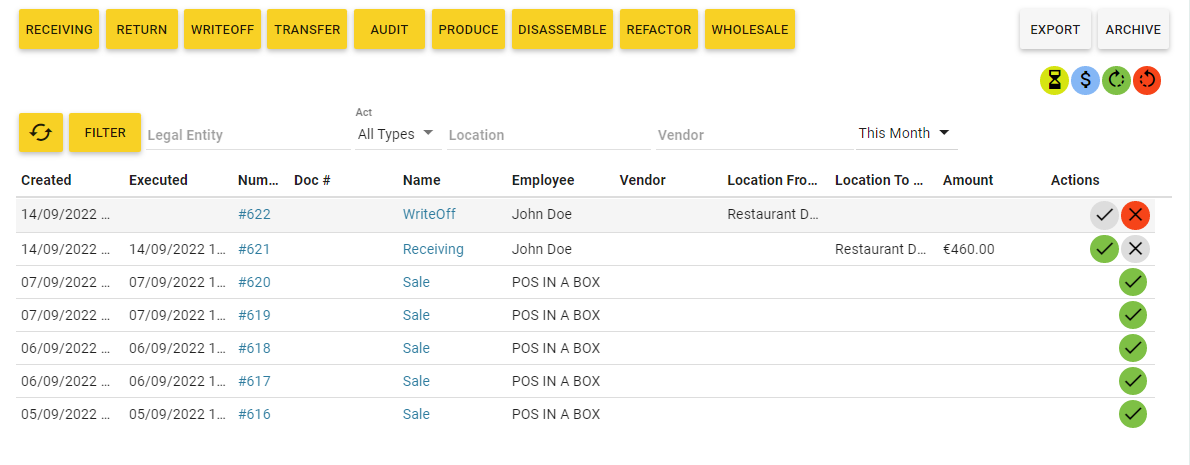
YumaPOS Journal of documents (hereafter Journal) lets you apply or unapply both separate documents and groups of documents. However, to perform these operations, the documents must meet certain conditions. To clarify, consider the following screen that illustrates Journal of documents:
When Your Documents Have Been Created not Later Than 40 Days ago
Rules for applying or unapplying such documents :
You can apply or unapply documents in any order, if they meet the following criteria:
- Documents have been created not later than 40 days ago.
- You had not performed the inventory audit after creating those documents.
When Your Documents Have Been Created Later Than 40 Days ago or After the Inventory Audit
IMPORTANT: You can apply such documents only in a chronological order. To apply a document on a previous date, you should first unapply all documents recorded after that date.
Rules for applying documents : To apply a document, ensure that you have unapplied all documents recorded later than your document.
Rules for unapplying documents: To unapply a document, ensure that you have unapplied all documents recorded later than your document.
If you attempt to process documents that do not meet the above rules, Back Office returns the following error message:

How to Apply or Unapply a Separate Document
To apply or unapply a document that meets the above rules, do the following:
To apply a document
- Hover the cursor over the icon
 next to the document (this icon turns into
  ), and then click
To unapply a document
- Hover the cursor over the icon
 next to the document (this icon turns into
  ) and then click
How to Apply or Unapply a Group of Documents
To apply or unapply a group of documents, in the top-right corner of the Journal screen use the following icons:
- — applies all documents recorded after specified date and time.
- — unapplies all documents recorded from current date down to specified date and time.
Sample Scenario: How to Apply a Document on a Previous Date
Consider the following scenario: today is March 30, but you want to apply a document and set its recording date to March 20. There are other documents recorded between March 20 and March 30.
Steps to Apply the Document
To apply the document, perform the following steps:
- In Journal, unapply all documents recorded from the current date down to the date when you want to apply your document (in our sample scanario, this date is March 20).
- Add your document to Journal, and set the document date to March 20.
- In Journal, apply all documents created from March 20 to March 30 (current date).
Updating Warehouse Documents
To update an applied warehouse document, complete the following steps:
- In the left pane of Back Office Management console, expand the Documents node, and then click Journal.
This displays a list of documents (in a chronological order). - Apply one of the following search criteria to find a document of your interest:
- To make Back Office to display specific warehouse documents, select a document type from the Act list.
- To display documents that are related to certain location or vendor, specify appropriate settings in the Location and Vendor fields, respectively.
- Specify the time interval (such as, Today, This month, This year, etc.) for which you want Back Office to display documents.
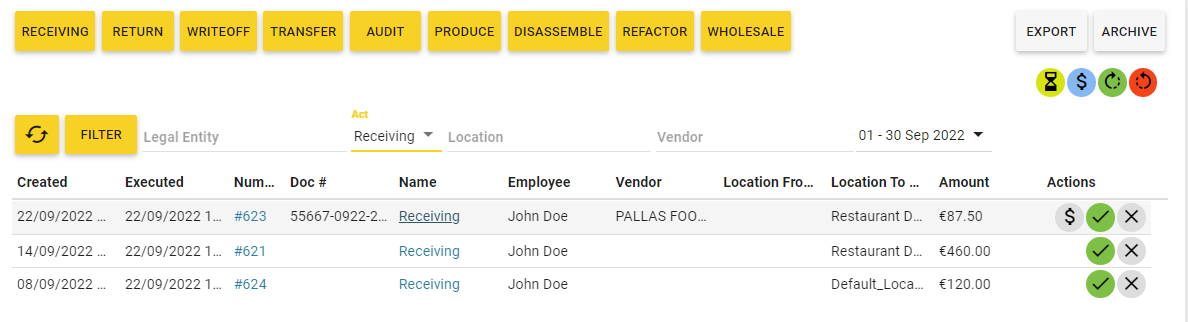
The following screen illustrates how to display the Receiving acts issued in current month:
- To view or edit a document, click the document number in the Number column.
- Update the document content as required, and then click Update to save your changes.:
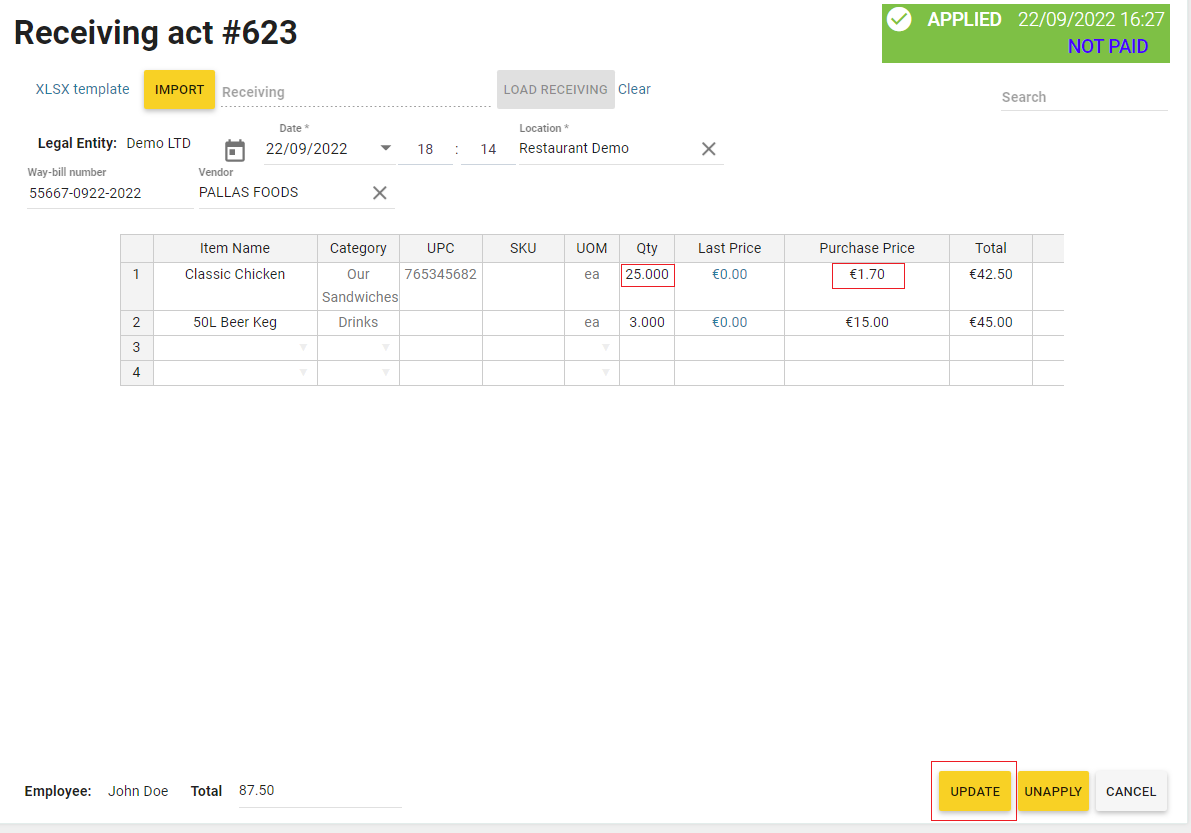
NOTE: This example helps you update the Receiving acts. You can update other documents in a similar way.