The customer orders can be closed once fulfilled by both parties – that is, items received and payment complete. You can view all closed orders on the Orders History screen of your POS terminal. The employees can manually close orders using their POS terminal.
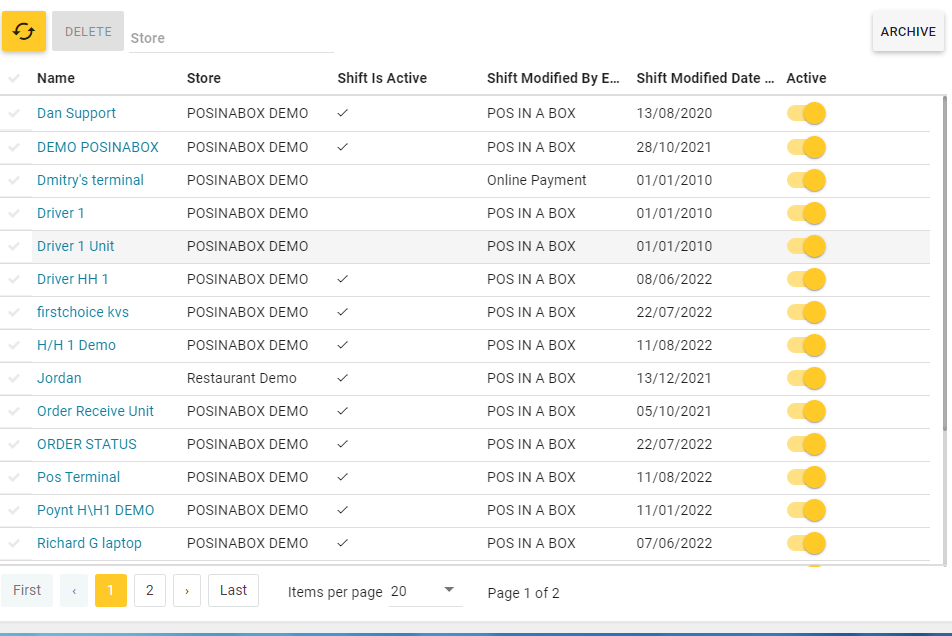
Now you can set up both POS and kitchen terminals for automatic closing the orders that have been paid at specific POS terminal. The list of all terminals registered in all your stores is available at the Back Office Management console (see the “View a List of Terminals” section later in this topic).
This topic explains how to use Back Office to configure your POS terminals to close orders automatically.
NOTE: This feature does not apply to orders that have been paid online, except the orders made using the vending machines. For more information and examples, see How to Create Scenarios of the Orders Closing.
View a List of Terminals
To view a list of POS terminals registered in all your stores, do the following:
- In the left pane of the Back Office Management console, click Settings, and then click Registers.
This opens a list of registered terminals is like the following screen:
Find a Terminal to Configure
To find a POS or kitchen Terminal
- From the Store list, select a store to which the terminal belongs.
- Find the terminal of interest in the Name column.
NOTE: The terminals are sorted in the alphabetical order. - Click the terminal name to open the terminal settings page.
Configure a Terminal
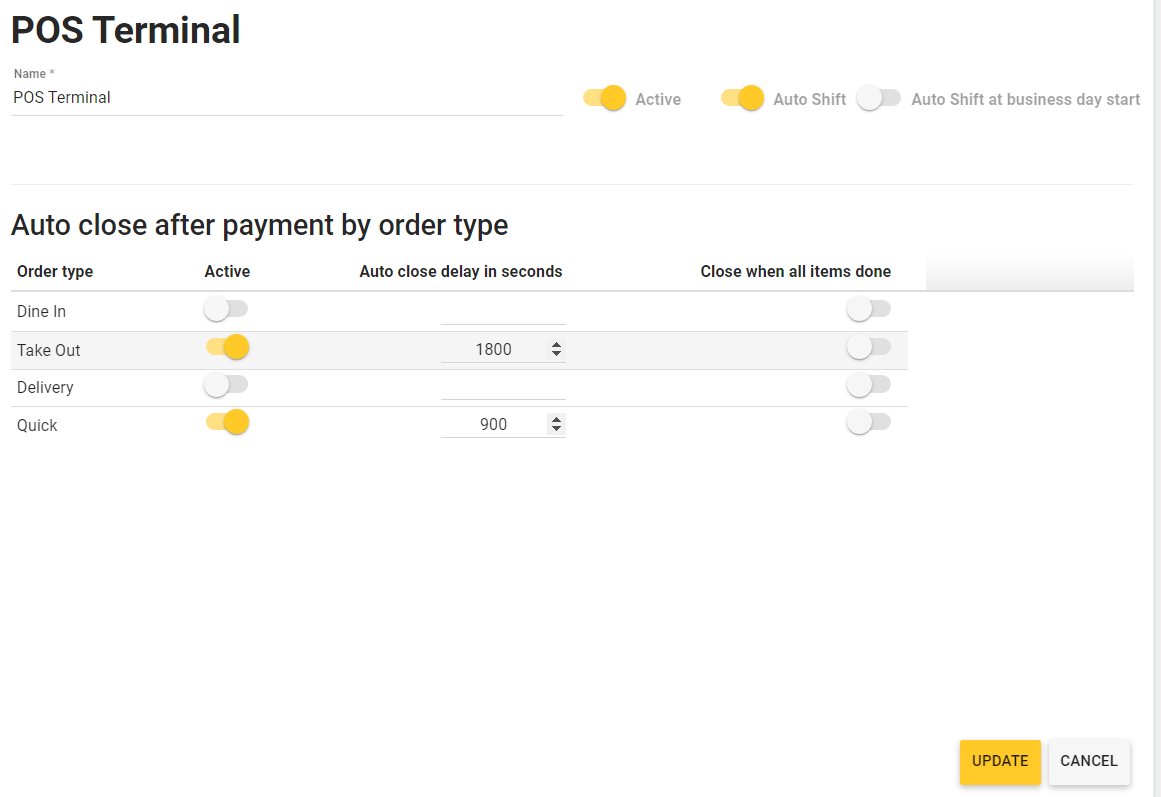
POS Terminal Settings
The POS terminal settings page is similar to the following screen:
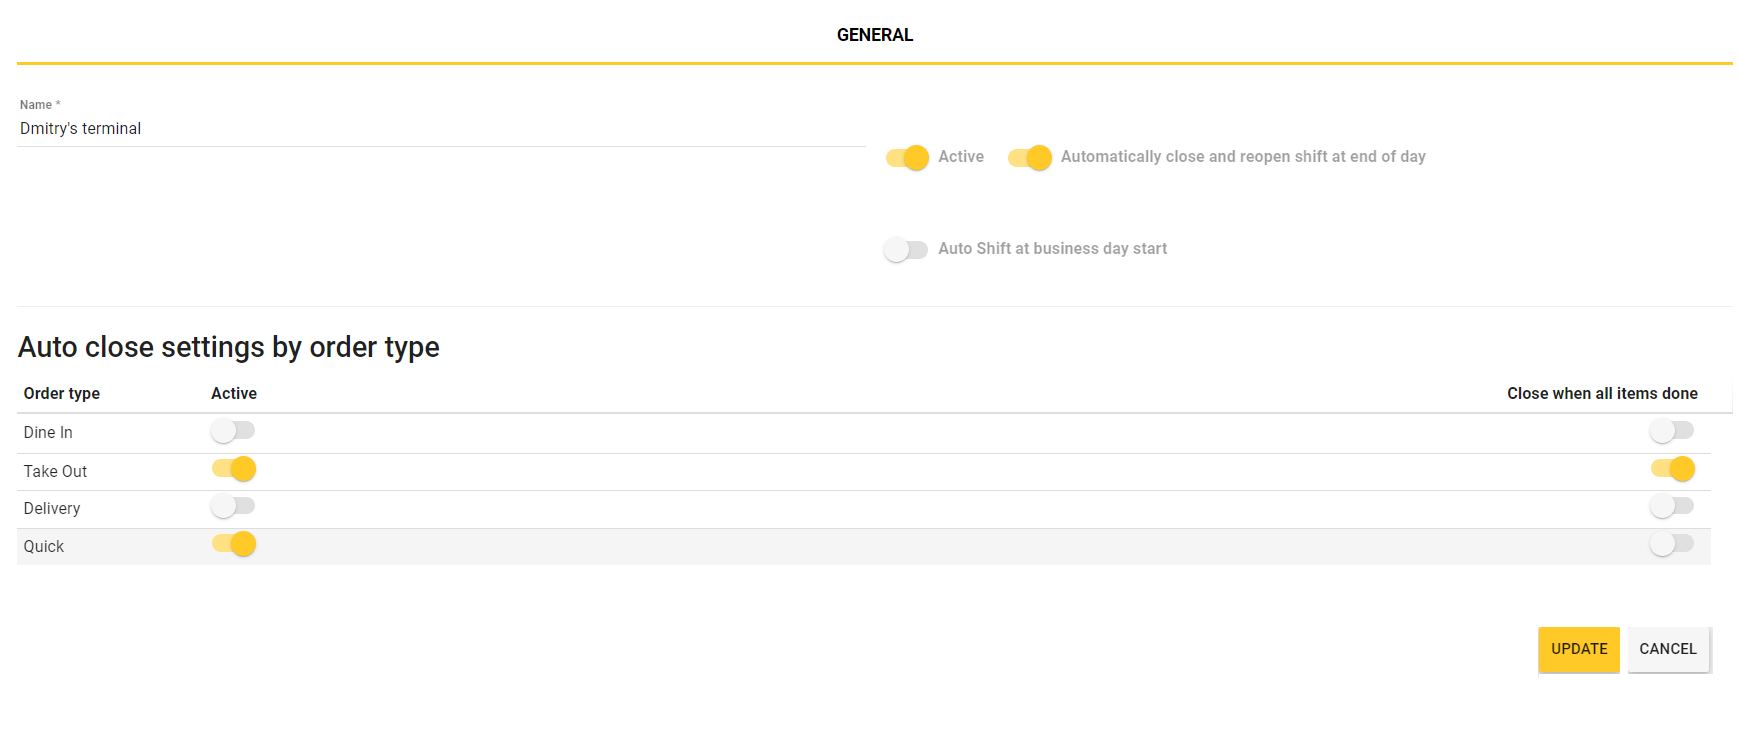
Kitchen Terminal Settings
The kitchen terminal settings page is similar to the following screen:
Description of Base Settings
You can configure the following base settings:
- Name (mandatory): sets the terminal name.
- Active: enable this setting to make POS terminal active.
If this setting is disabled, the POS terminal cannot be used for paying the customer orders. - Auto Shift: enable this setting to have the shift to close automatically in 24 hours after the shift start.
- Auto shift at business day start: if this setting is enabled, the shift will close automatically at business day start.
The business day start is configured in settings of the store to which this POS terminal belongs. For more information, see the “Business Day Settings” section in Register Stores.
Configuring Rules for Closing Orders
To configure rules for closing orders
- Make appropriate settings under Auto close after payment by order type:
- Enable the setting in the Active column next to the order type you want to close automatically.
- If necessary, in the Auto close delay in seconds column, set the close delay time.
For example, set 3600 s for a delay of 1 hour.
NOTE: This setting is available only for POS terminals. The kitchen terminals have no this setting.
- If the Close when all items done setting is enabled, all orders paid using this POS terminal are closed automatically only if in the kitchen terminal, all items of that order have the state Done.
IMPORTANT: If you first set the order items state to Done, and then pay the order, Yumapos uses the settings of the POS terminal where the order has been paid. Otherwise, Yumapos uses the settings of the kitchen terminal. That is why, it is very important to configure the kitchen terminal properly.
Settings Used for Automatic Closing the Orders
For more information and sample scenarios of the automatic closing the orders that can be applied for various types of business, see How to Create Scenarios of the Orders Closing