This topic guides you through steps of creating new staff member. The following steps are covered:
Add Roles for New Staff Member
Before creating new staff member, ensure that you have added all roles you want to assign to them.
For detailed instructions on how to view existing roles or add new roles, see Roles.
Create New Staff Member
To create new staff member, use the Add User wizard available in Back Office, on the Staff > Staff List settings page.
For detailed instructions on how to create new staff member, see “Add New Staff Member” in Staff List.
Set up a Staff Member Profile
After creating new staff member, specify advanced settings in their profile.
Complete the following steps:
- In the Staff list, click a newly created staff member (employee).
- Specify appropriate settings on the General tab:
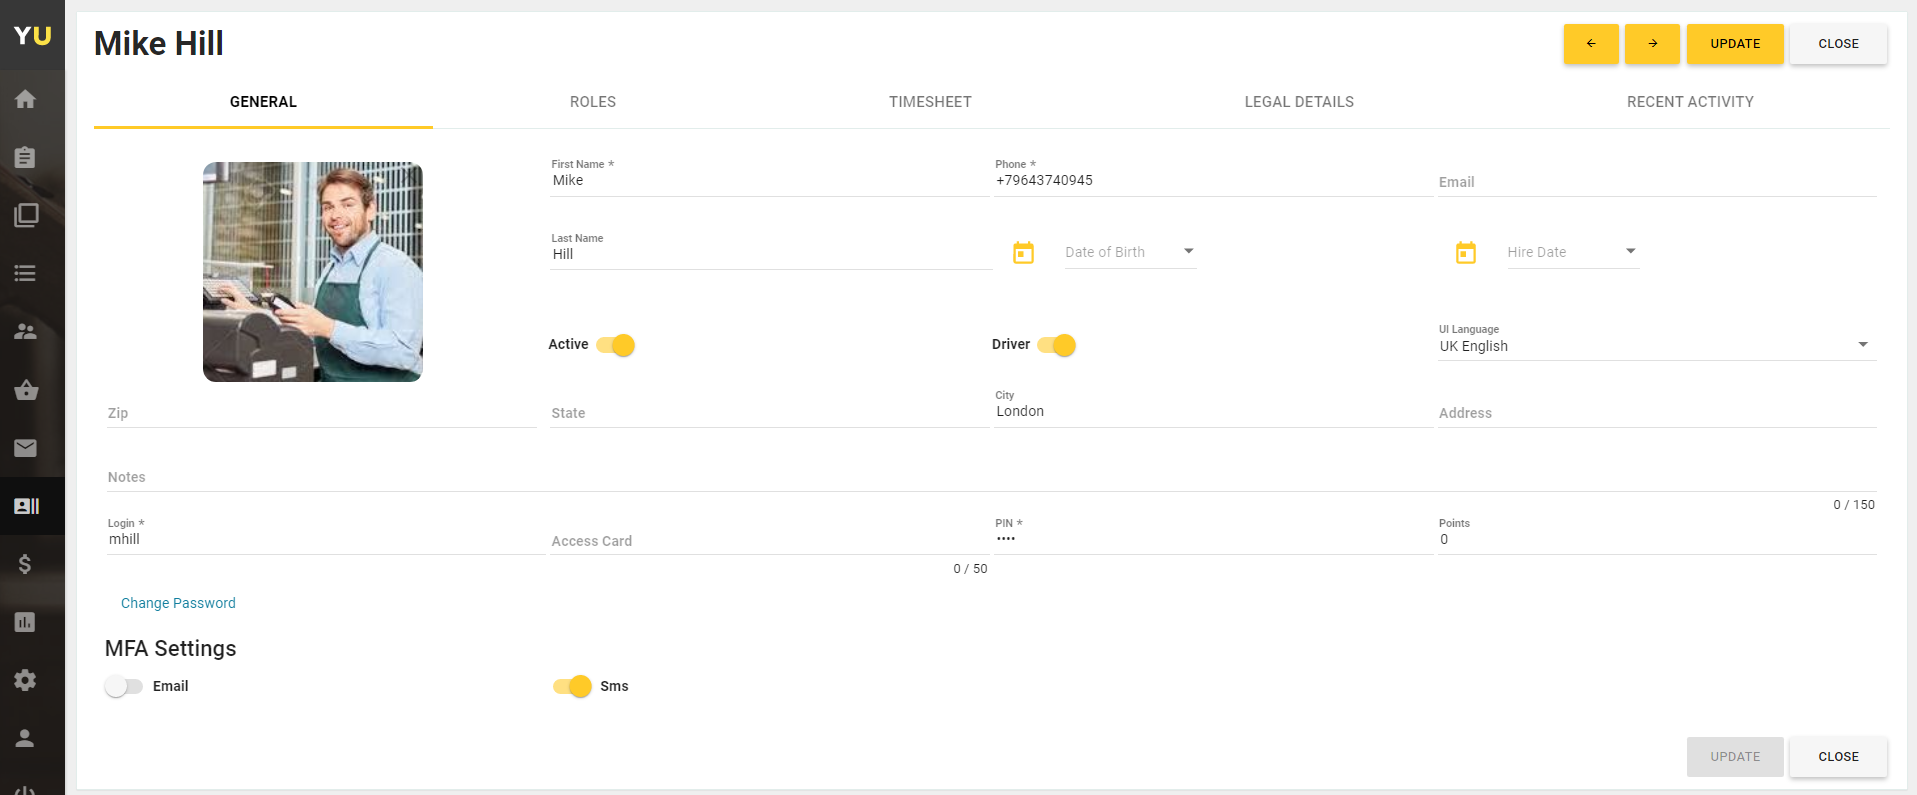
On this tab, you can specify the employee personal information, such as name, phone, postal address, etc. In addition, you can specify the following important data:
- Active: specifies whether the employee account is active.
- Driver: specifies whether the employee has a valid driver license.
If you turn this toggle button ON, this employee is added to the Drivers list available in POS Terminal apps, and you can assign delivery orders to this employee. - Phone*: specifies the employee phone.
- Login*: specifies a login name used to log in to Back Office.
- Pin*: specifies a 4-digit PIN used to identify the employee and log in to POS Terminal applications.
- Change Password: allows you to reset the employee password.
- MFA Settings: lets you enable multifactor authentication (MFA) for this employee. MFA makes the employee account more secure. You can turn on the Email or (and) SMS switch button to use additional way of confirming the employee identity when they try to sign in. In this scenario, after entering the user password, they should enter a security code delivered through a mail or SMS message.
*NOTE These parameters are mandatory. However, to authorize an employee to log in to Back Office or POS Terminal, you should assign appropriate rights to their roles. For details, see Roles.
- Specify appropriate settings on the Roles tab:
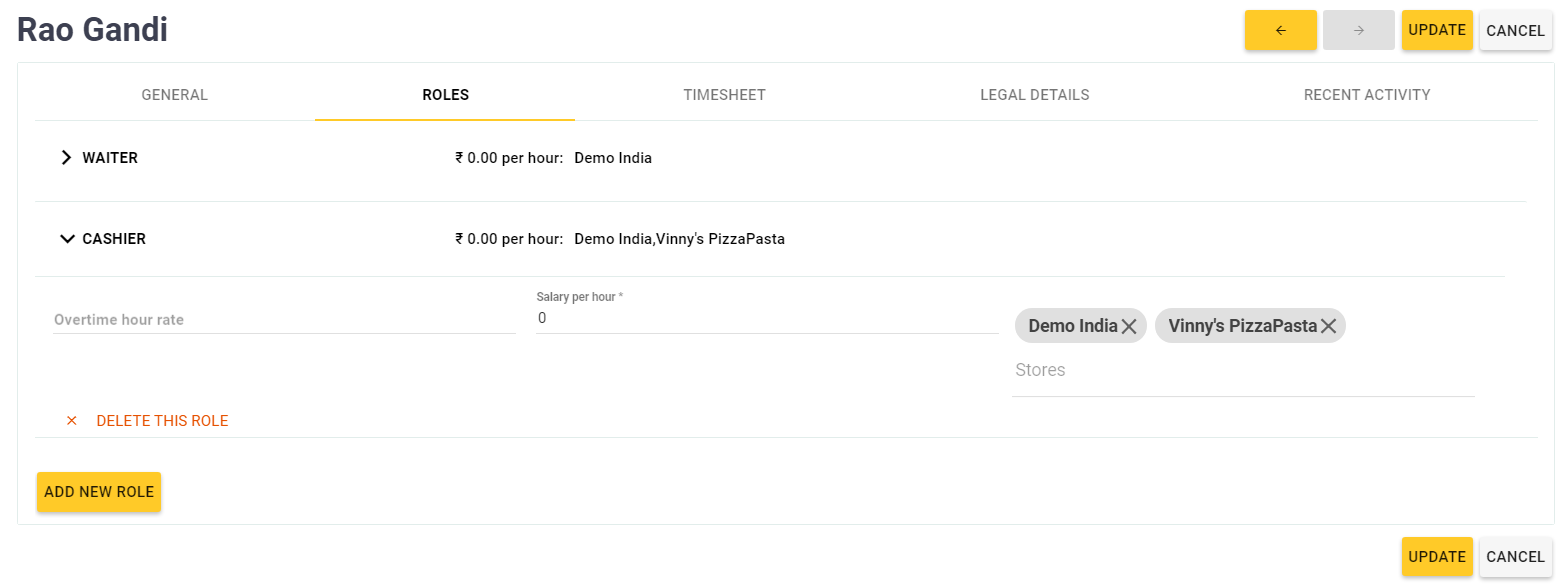
On this tab, you can manage a list of the employee roles:
- To add new role, click Add New Role and follow the provided onscreen instructions.
- To add the stores where this role is active, select the role, click Stores, and select stores from the provided list.
- To remove a role from the employee roles list, select the role, and then click Delete This Role.
- Specify appropriate settings on the Legal Details tab:
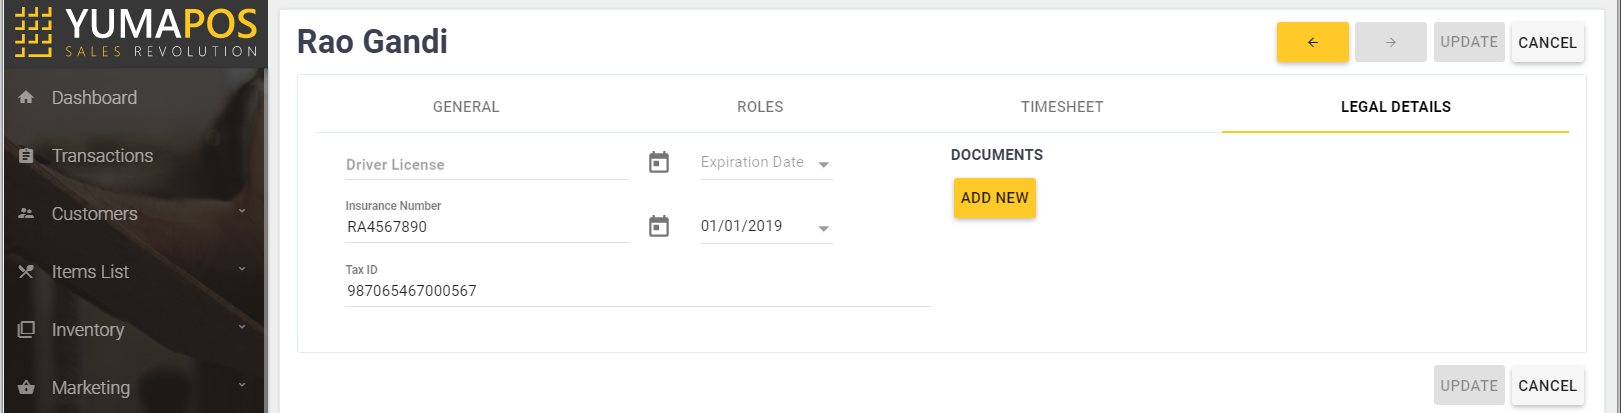
On this tab, you can specify the following legal information:- Driver license: specifies the license type and expiration date.
- Insurance Number: specifies the insurance number and expiration date.
- Tax ID: specifies the tax identification number.
- When finished, click Update.
NOTES:
- The TimeSheet tab displays the employee timesheet for a specified period.
- The Recent Activity tab displays a list of transactions performed by the employee.
- You can skip those tabs when setting up new staff member profile.