About Price Lists
Price lists include information on prices of all your items and modifiers. If you add new item or general modifier, it is automatically added to the Base Price List.
Back Office allows you to create additional price lists and assign them to specified stores. Thus, you can use different prices in different stores.
The price lists can be used for creating promotional campaigns.
This topic helps you work with price lists.
View Price Lists
To view all available price lists
- In the left pane of Back Office Management console, expand the Items List node, and click Price Lists:
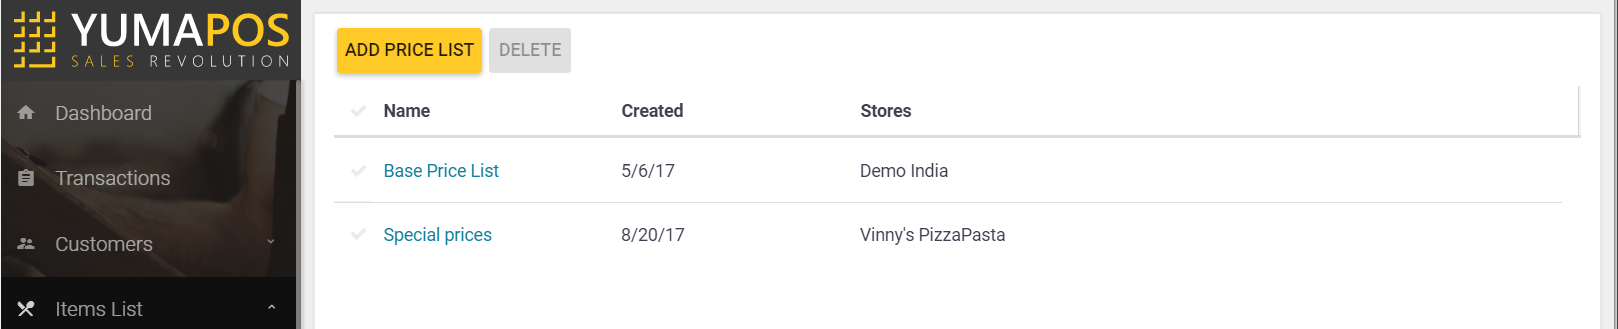
Each item of this list has the following columns:
- Name: displays the price list name. Click that name to view the price list details.
- Created: displays the date when this price list has been created.
- Stores: displays the names of stores, which use this price list.
Add New Price List
To add new price list
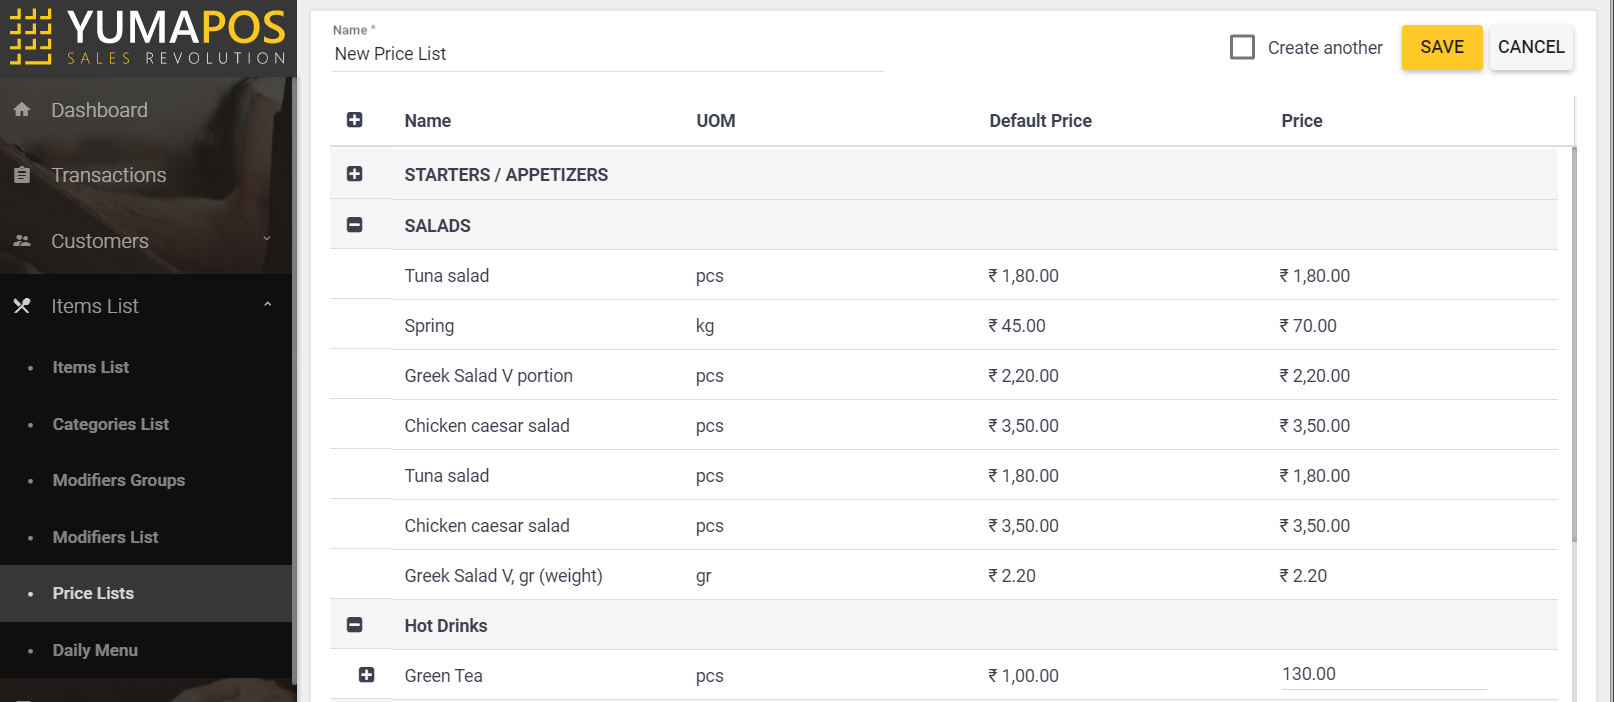
- Click Add Price List.
- In the form that opens, specify the price list name in the Name text box.
- Expand the nodes of the menu item categories or modifiers groups, and edit the prices in the Price column, as necessary.
- When finished, click Save.
Important: After creating new price list, assign it to desired stores as described in the section that follows.
Assign Price List to Store
Newly created price lists are not assigned to any store.
To assign a price list to a store
- In the left pane of Back Office Management console, expand the Settings node, and then click Stores.
- In the list of stores that opens, click the store to which you want to assign the price list.
- Beneath the right part of the store properties page that opens, click the Price List element, and select the newly created price list.
- Click Update to save your changes.
View and Modify a Price List
To view a price list content, click the list name on the Price Lists screen (see “View Price Lists” earlier in this topic). After you clicked the price list name, YumaPOS displays the Filter Price List Items dialog box similar to the following screen:
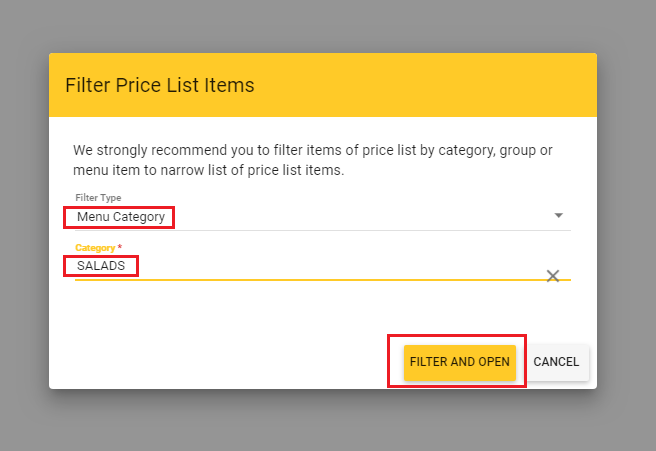
This dialog box lets you filter the price list by menu categories, menu items or the common modifier groups.
To filter a price list, in the Filter Price List Items dialog box, do the following:
- From the Filter Type list, select a filter type (possible types are: Menu Item, Menu Category, or Common Modifier Group).
- From the second list (its name depends on the selected filter type), select the filter criterion, such as the menu item name, or menu category name.
- Click Filer and Open.
In the given case, the price list will display only salads:
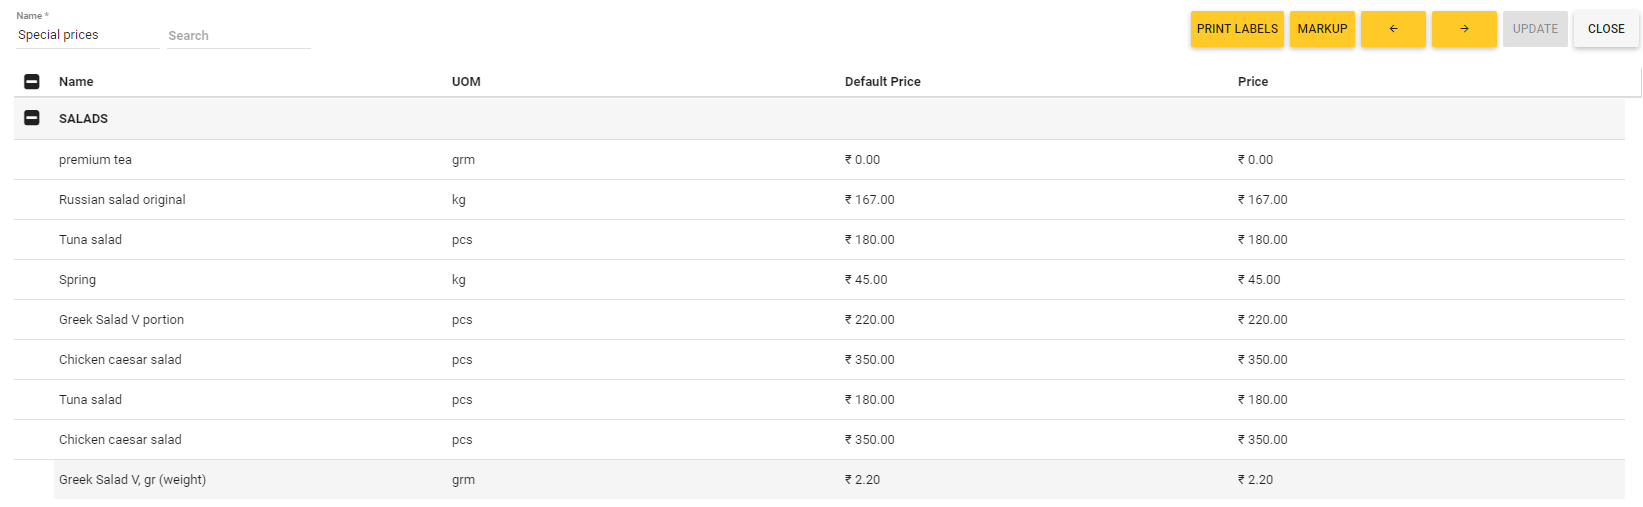
On this screen, you can perform the following operations:
- Change prices of all filtered items. To do this, click Markup, and then complete the Markup dialog box that opens. To clarify this operation, consider the following example:
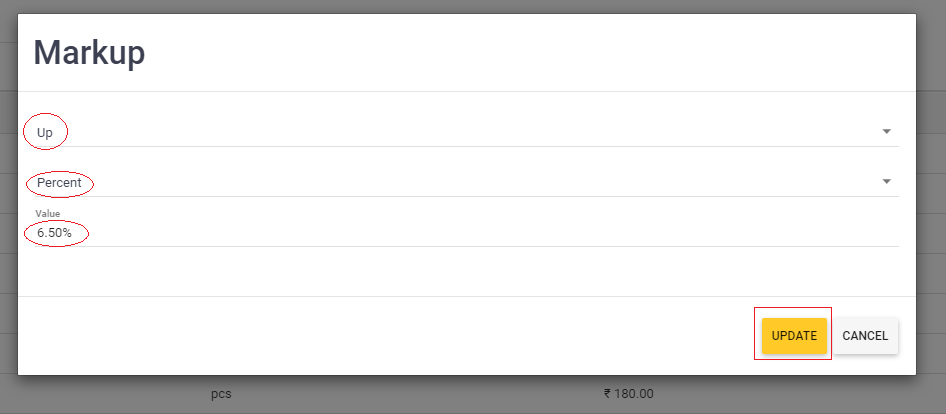
The above shown Markup dialog box sets the price markup to 6.5% for all displayed items (in our case, the salads).
NOTE: Using the Markup dialog box, you can both up and down the selected items prices.
- Print price labels for all displayed price list items (in our scenario, all salads). To do this, click Price labels, and then complete the Print Price Label dialog box similar to the following screen:
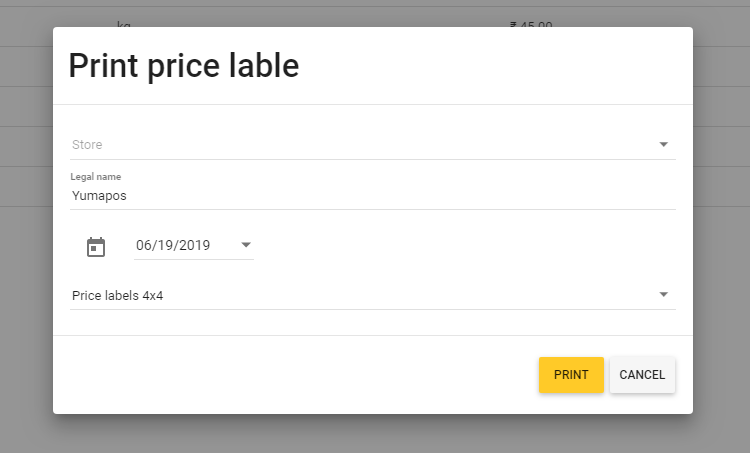
To complete this dialog, specify the print parameters (see later in this topic), and click Print.
NOTE: You can print the price labels using any installed printer.
The Print Price Label dialog box defines the following elements:
- Store: from this list, select a store for which you want to print the price labels.
- Legal name: specifies the legal entity for selected store.
- Date: using the calendar-like control, pick the date.
- Price labels: from this list, select the price label dimensions (width x height) in centimeters, such as 2 х 3 or 3 х 4.