About This Feature
For efficiency of your business, it is important to manage processing the customer orders made through Mobile app or the store web site. In this section, those orders are referred to as online orders. The estimated order delivery time depends on the load on your orders processing center. In YumaPOS, we measure the load in the number of online orders per certain time slots.
Using the special table of the time slots, you can set the delay time for completing orders made during the high load on your store, and the customer notification message that is displayed in Mobile app or the store site.
Note: This feature applies only to online orders. If your store does not support online orders, you may skip this topic.
Create the Time Slots Table
To create new time slots table
- From the left navigation pane of the Back Office Management console, select Settings > Time Slots.
This operation opens a list of registered tables that is similar to the following screen:
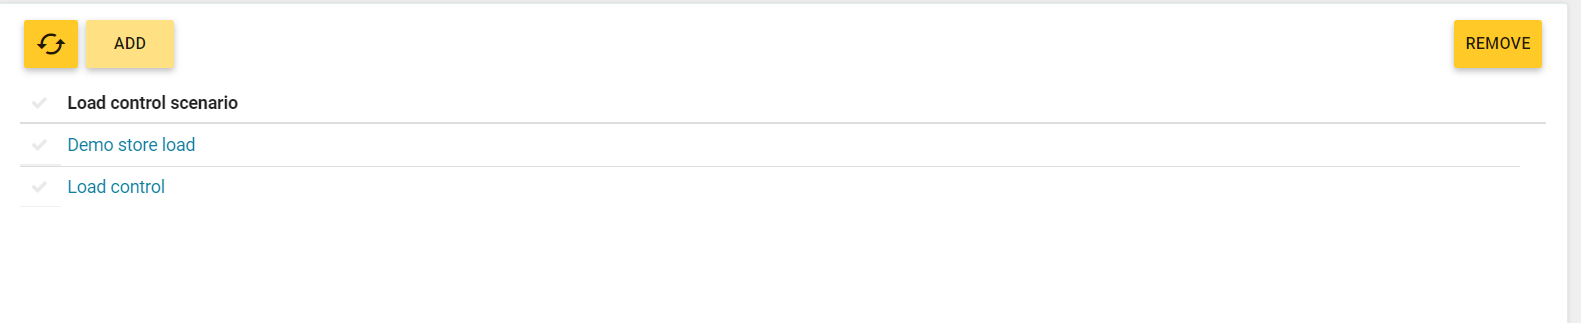
- To add new time slots table, click Add, complete the Add Time Slots Settings form, and then click Save.
How to Complete the Add Time Slots Settings Form
This section helps you specify the time slots settings.
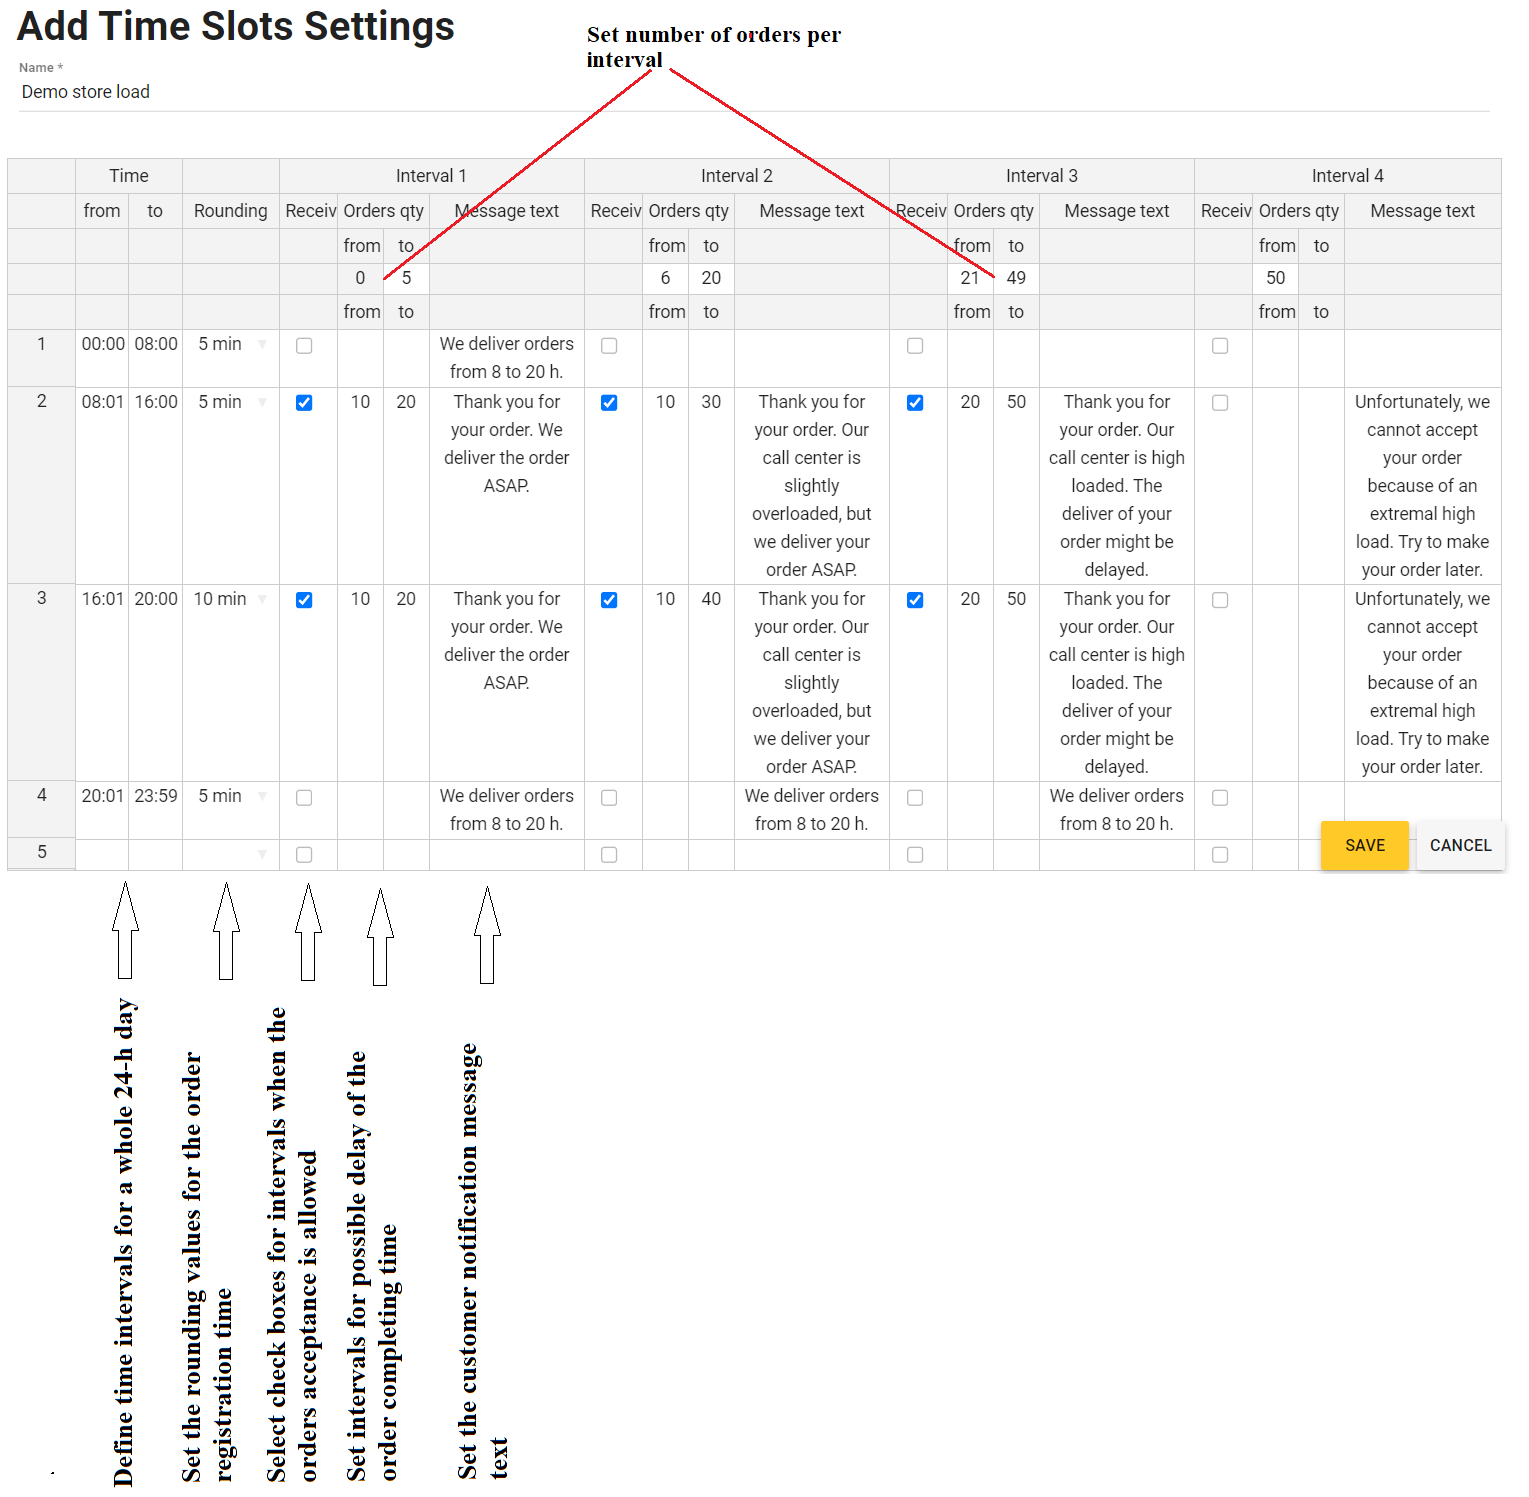
The form is a table, which includes the following columns and rows:
- The Time column: in this column, divide the whole day (from 0 to 24 h) into several periods with different load on your orders processing service.
Important: You should define periods for the whole 24 h-day including the period when your store is closed. - The Rounding column: in this column, specify the rounding value (in minutes) for the order registration time. To clarify, consider the following example: the rounding value is 15 minutes, and a client made their order at 14:02. In this scenario, the order registration time is considered to be 14:15. The order delivery time will be calculated basing on this rounded time 14:15.
The Rounding value as well as the from and to values (see later) let you control the estimated time of the order delivery that is reported to the customer. Increase values of those parameters when the load increases. - The parameters in the group of columns Interval 1, Interval 2, etc. let you control different scenarios of the orders processing. Interval 1 corresponds to the lower load (0 to 5 orders), while Interval 4 corresponds to the highest load (50+ orders).
For each interval, specify values in the following columns:
- Receive: select this check box to allow the customers to make their online orders. If you leave this check box cleared, the customers cannot make online orders (for example, when the store is closed, or because of a high load). In this case, we recommend that you set a notification message in the Message text box (see later).
- from: specifies a minimum delay (in minutes) of the order delivery (completing) time.
- to: specifies a maximum delay (in minutes) of the order delivery (completing) time.
- Message text: specifies a notification message text to display in Mobile app or the store site after the customer made their order.
Calculation of the expected time interval for order delivering
To clarify the use of the time slots table, consider the procedure that YumaPOS uses to calculate the approximate (expected) time interval for order delivering. The following parameters influence on the order completion and delivering:
- Rounding the order registration time (this parameter is specified in the time slots table): 5 minutes in our scenario.
- The from and to parameters that define a minimum and maximum delay of the order delivery (these parameters are specified in the time slots table): 5 minutes in our scenario.
- Maximum delivery time for a selected delivery zone (this parameter is set in the store data sheet — for more information, see Advanced Parameters of Stores): 30 minutes in our scenario.
- Assembly time (cooking time) of the order items (this parameter is set in the menu item properties — for details, see Items List): 0 minutes in our scenario.
- Order registration time (registration time in Mobile app or the store web site): 09:51 in our scenario.
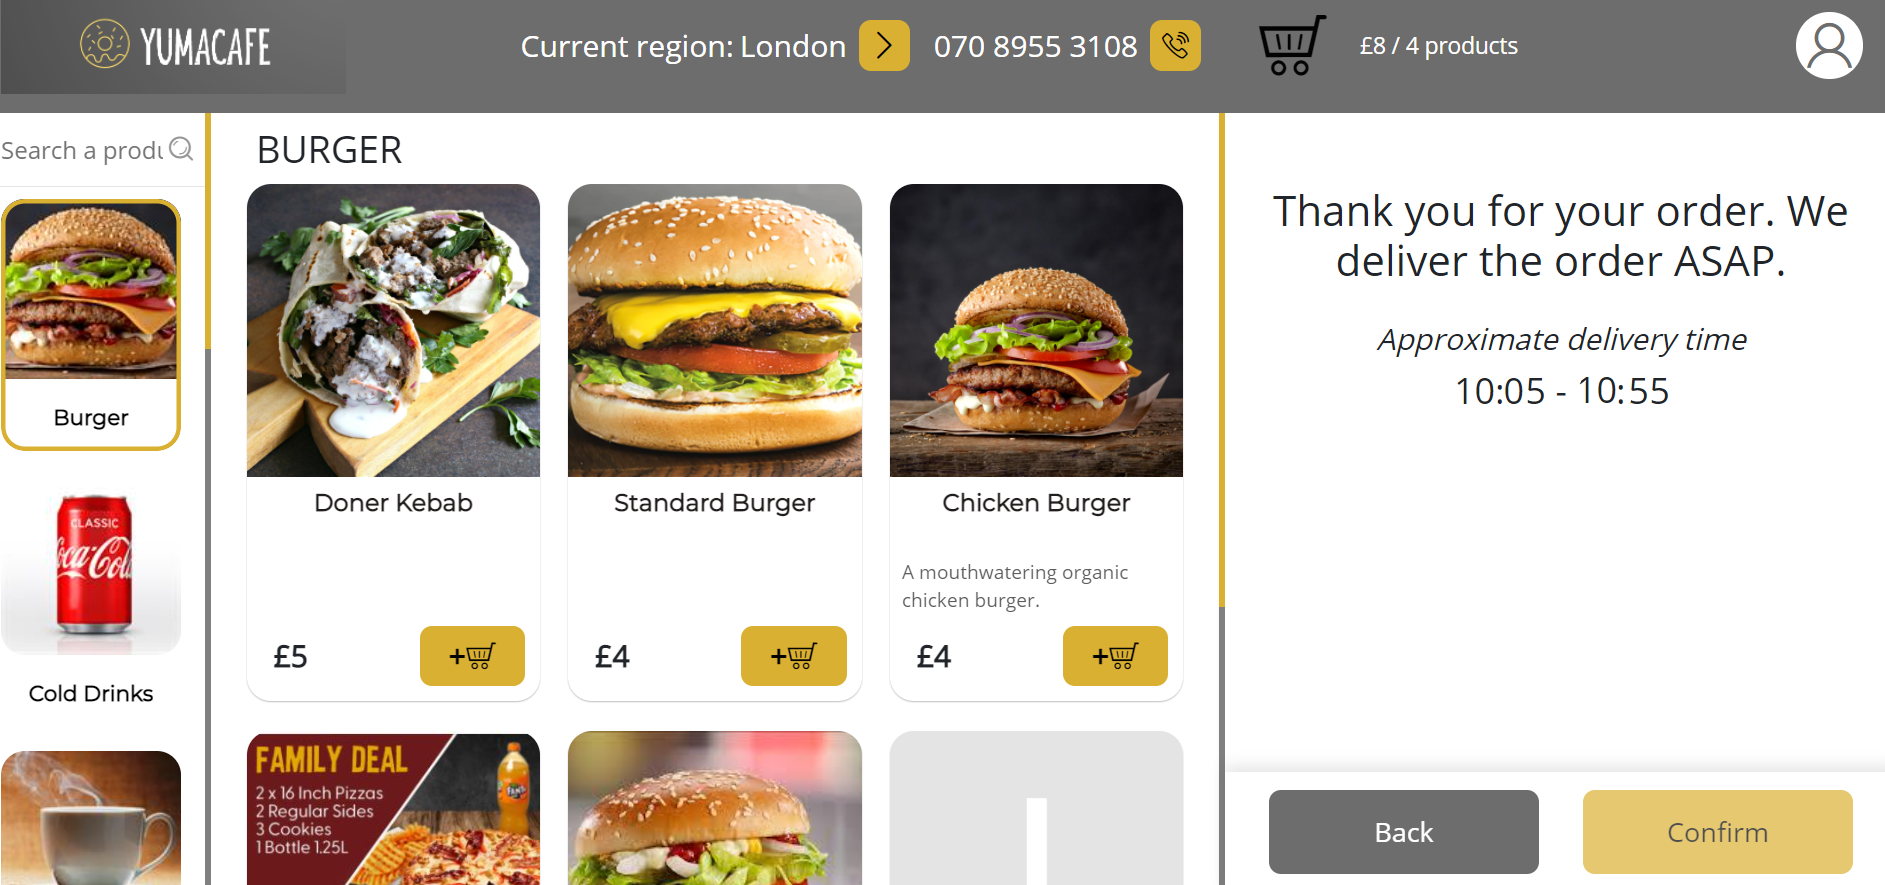
Mobile app or the store web site sends the following notification messages to customers:
Note: The message text depends on the order registration time and the load level.
- If the order registration time from 0 t0 8 h or from 20 to 24 h: «We deliver orders from 8 to 20 h» (this means that customers cannot make their orders).
- If the order registration time from 8 to 20 h:
- for the number of orders up to 5: Thank you for your order! We deliver the order ASAP. Approximate delivery time 10:05 -10:55:
- for the number of orders from 6 to 20: Thank you for your order. Our call center is slightly overloaded, but we deliver the order ASAP. Approximate delivery time 10:05 -11:05
- for the number of orders from 21 to 49: Thank you for your order. Our call center is high loaded. The delivery of the order might be delayed. Approximate delivery time 10:15 -11:35
- when the number of orders exceeds 50: Unfortunately, we cannot accept your order because of extremal high load. Try to make your order later.
- for the number of orders up to 5: Thank you for your order! We deliver the order ASAP. Approximate delivery time 10:05 -10:55:
Algorithm for Calculating an Approximate Delivery Interval
An approximate time range (interval) for order delivery is calculated in the following way:
- Lower range limit: the rounded order registration time + the from parameter value + the order assembly time.
- Upper range limit: the lower range limit + maximum delivery time + the to parameter value.
Let us apply this algorithm to our sample scenario (see the above time slots table):
Lower range limit: the actual time of the order registration: 09:51 -> accounting the rounding value 5 minutes: 09:55 + the from parameter: 10 minutes + assembly time: 0 minutes = 10:05 ;
Upper range limit: the lower range limit (10:05) + maximum delivery time (30 minutes): 10:35 + the to parameter (20 minutes): 10:55
In this scenario, a customer will receive the notification message: Approximate delivery time: 10:05 — 10:55.
Link Time Slots Table to a Store
To use a time slots table, it is necessary to link the table to a store. You can perform this operation during the store registration or later.
To link the time slots table to a store
- From the left navigation pane of the Back Office Management console, select Settings > Stores.
This operation opens the list of registered stores. - In the stores list, click the store name, and then on the store data sheet, click the yellow bar that displays the store opening days:
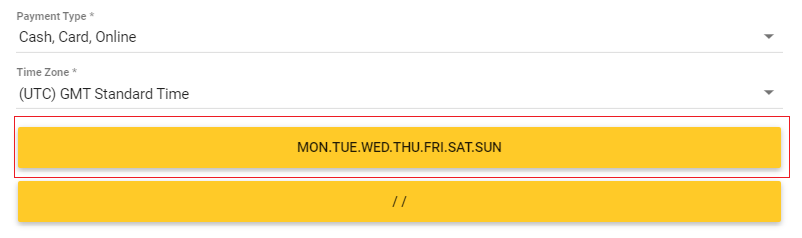
This opens the Opening Hours dialog similar to the following screen: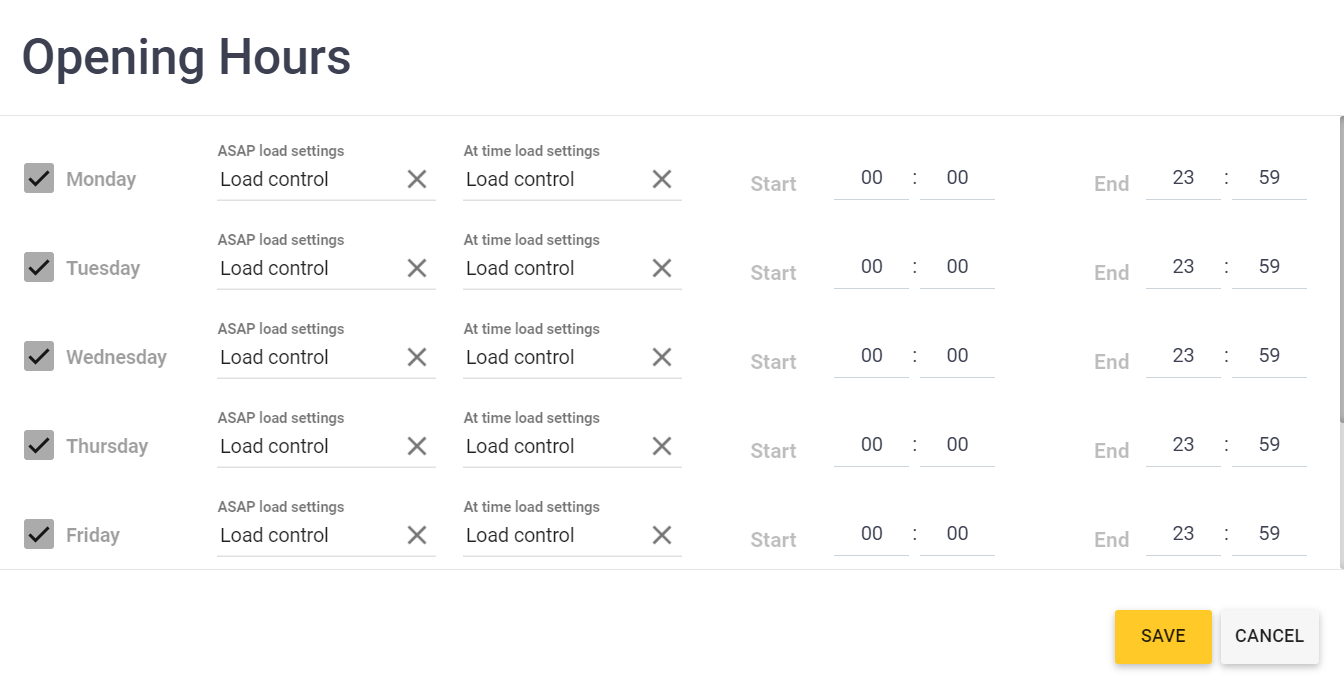
- On the Opening Hours dialog, add the previously created time slots table to both the ASAP load settings and At time load settings columns.
TIP: To add a time slots table, click the cell next to a day of week, and then select the table from the list. - Click Save.
See Also