This topic covers the following subjects:
- View a list of purchase orders
- View and edit existing orders
- Make new purchasing order
- Duplicate an order
- Delete orders
View a List of Purchase Orders
To view a list of existing purchase orders
- In the left pane of Back Office Management console, expand the Inventory node, and click Purchase Orders.
This displays a list of existing purchase orders similar to the following screen:
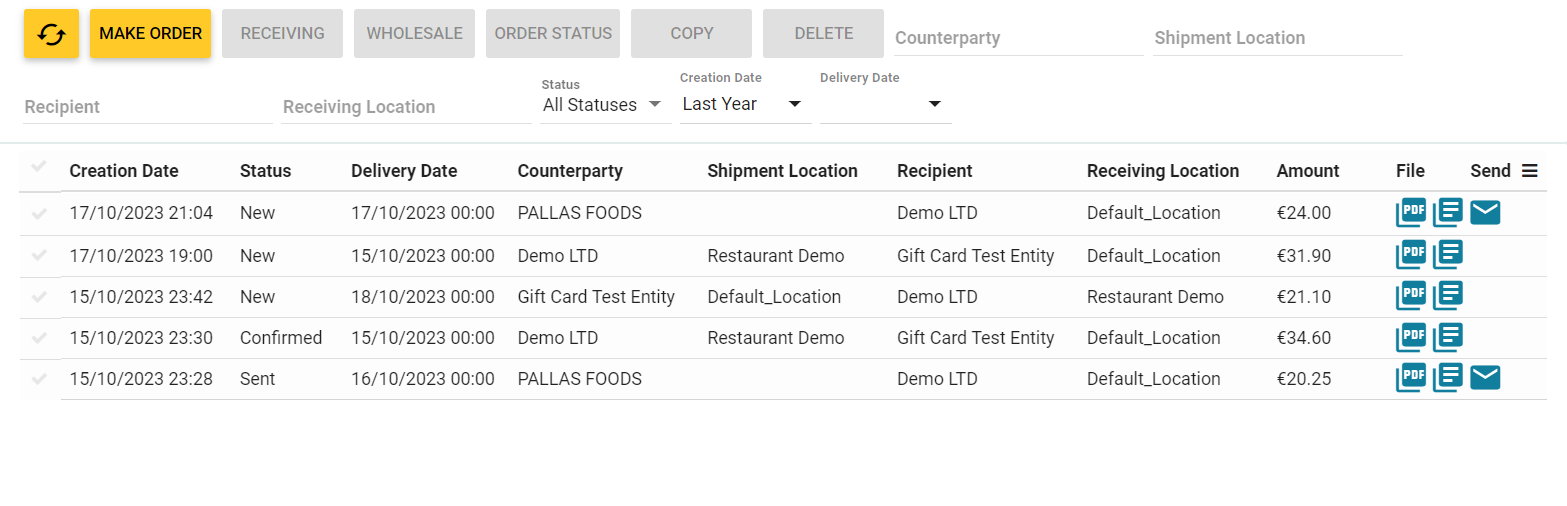
This page defines the following elements: : click to refresh the current list of orders.
- Make Order: creates new purchase order.
- Receiving: creates new Act of receiving based on the selected Purchase order.
- Wholesale: creates new Wholesale act based on the selected Purchase order.
- Order status: lets you change status of selected order.
- Copy: clones a selected purchase order.
NOTE: The cloned order is added on the top of the purchase orders list. - Email: sends selected purchase order to the vendor. The email address is defined in the vendor properties – for more information, see Vendors.
- Delete: delete selected purchase orders.
 – the icons group in “File” and “Send” columns allows you to save the order in PDF or Excel format, as well as email the order to the counterparty’s e-mail address specified in the counterparty profile).
- To view or edit detailed information about existing order, click the order number in the PO# column (see View and edit existing orders later in this topic).
Filter the List
The top menu bar lets you configure a filter to display only orders that meet the specified criteria:

The filter automatically updates the purchase orders list. For example, the above filter causes Back office to display only purchase orders for the Demo LTD counterparty that have been created in October, 2023.
View and Edit an Existing Order
To view details of a purchase order, open a list of orders (see View a list of Purchase Orders), and then click the order number in the PO# column. Back Office displays the Purchasing Order form similar to the following screen:
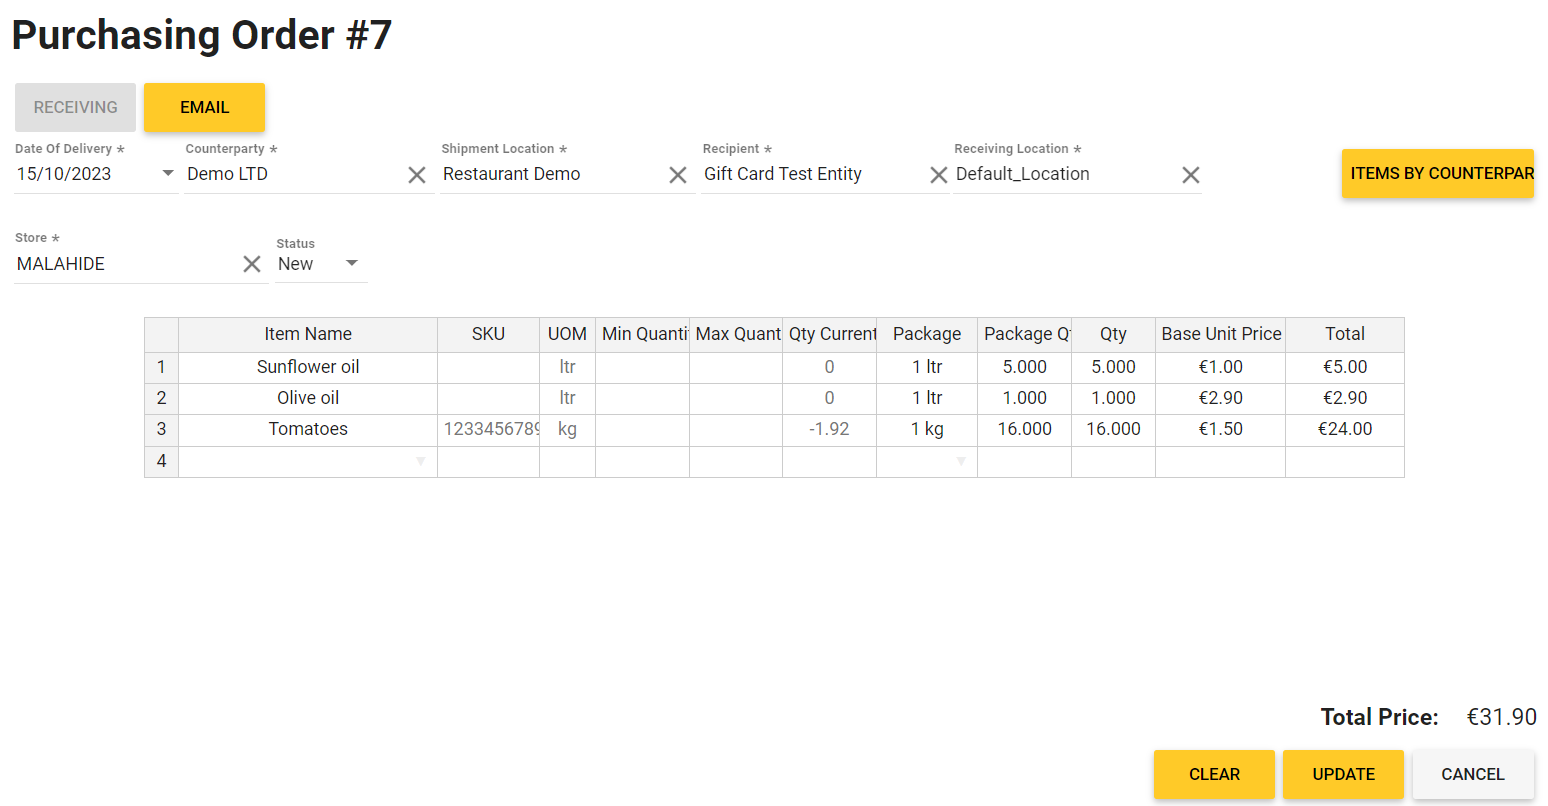
The form elements allow you to perform the following operations with the order:
- Receiving: opens new Act of receiving based on this purchase order.
- Email: emails the order to counterparty.
- Top menu bar: lets you change parameters of current order (such as the order status, recipient, etc.).
- Items by Counterparty: (available only for orders with the New status) opens the Items by counterparty form that lets you add the items of current vendor to this purchase order. The Items by vendor form is similar to the following screen:
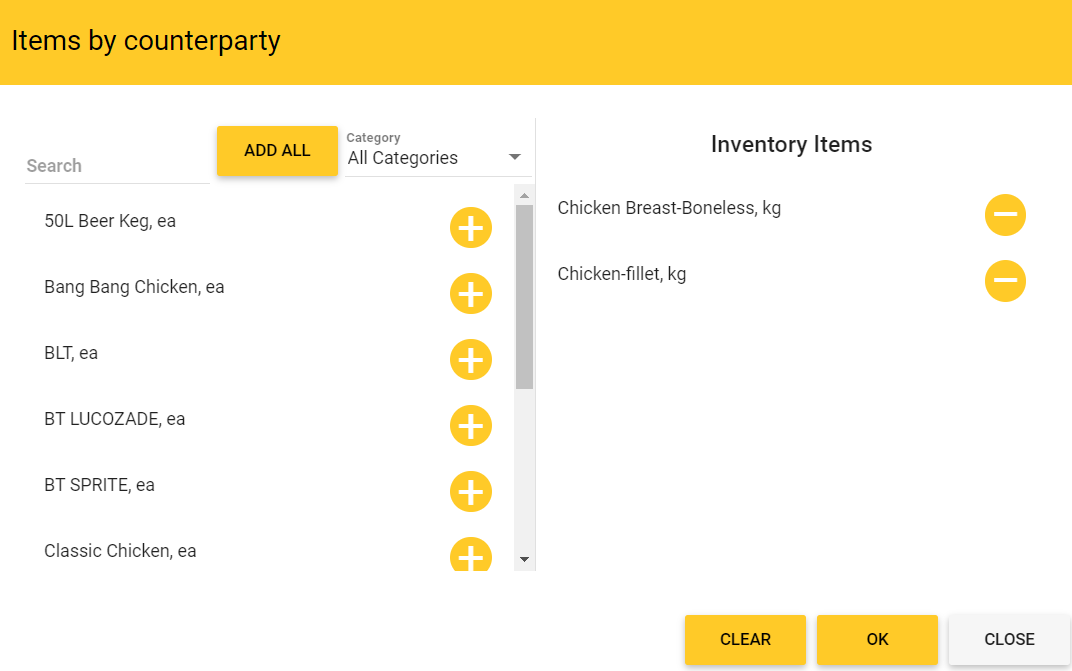
In this form, do the following:
- Click
 next to items that you want to add to this purchase order.
 - Click
 next to items that you want to remove from the Inventory items area.
 - Click OK to add selected items and close this form.
Make New Order
This section helps you create a purchase order, based on which you can have delivery of your stock later.
To make new order
- Open a list of orders (see View a list of Purchase Orders).
- Click Make Order, and complete the Add Order form.
To clarify these steps, consider the following form that creates new purchase order:
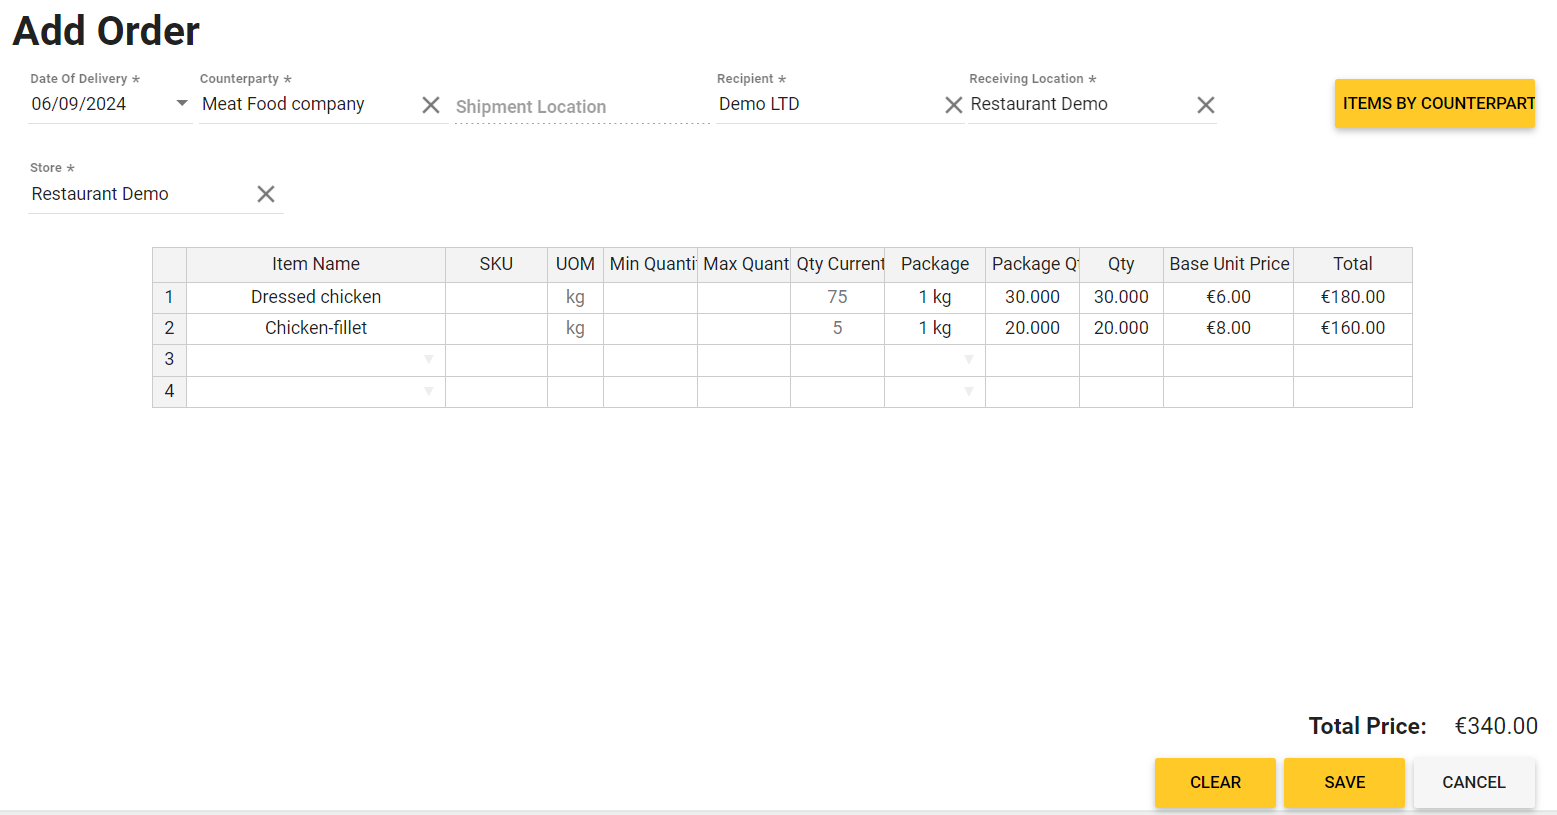
To complete this form, do the following:
- Specify the delivery information in the Counterparty, Shipment Location, Recipient, and Receiving Location fields. Add the delivery date to Date of Delivery.
- Add items to the order using the Items by Counterpart button (for details, see previous section) or start typing an item name in the Item Name column, and then select item from the provided list.
NOTE: If you cannot find an inventory item of interest, you should add that item to inventory using Back Office menu Inventory > Inventory Items (see Managing Inventory Items). - Specify the purchase information for each item in the Qty (quantity) and Base Unit Price fields.
- Click Save.
Order Creation Details
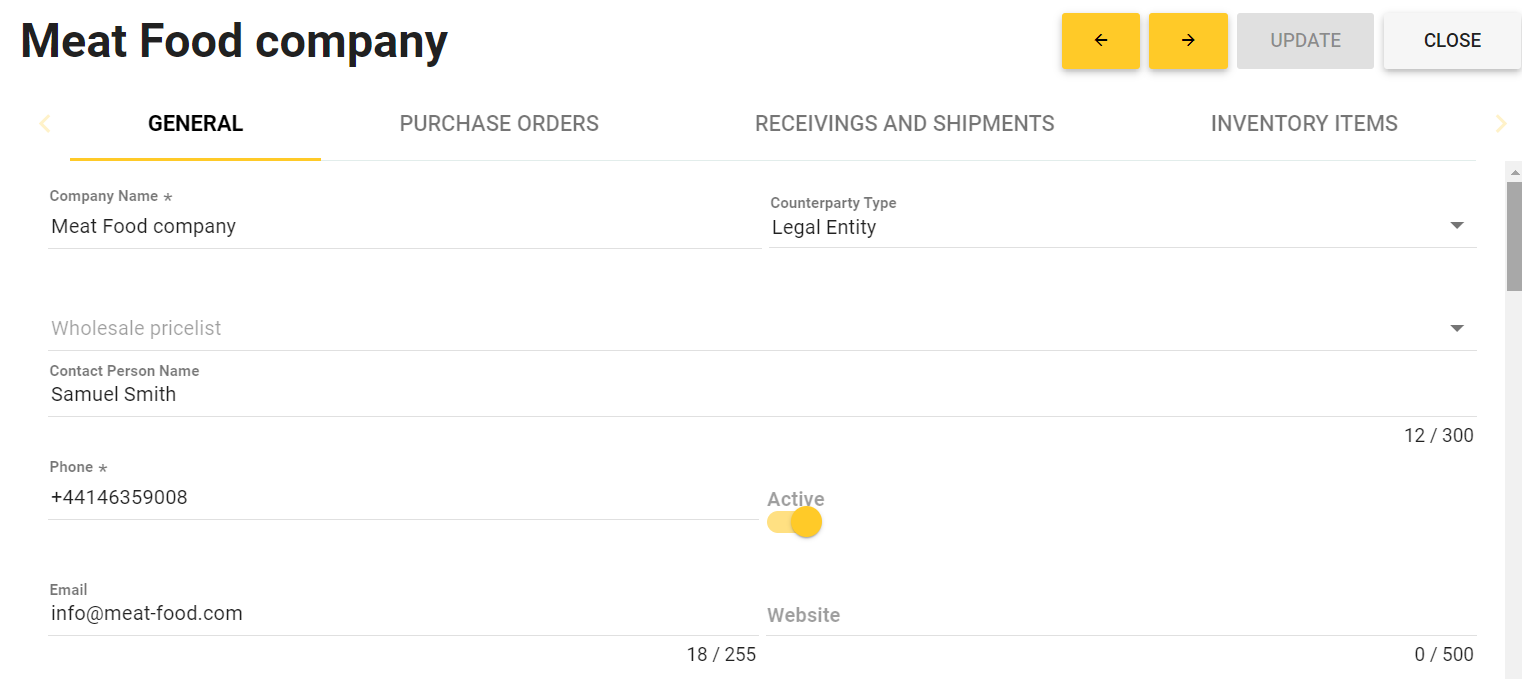
YUMA system allows you to configure special settings for working with certain counterparties. For a counterparty, you can set a minimum order amount and credit limit to allow orders to be placed on credit, up to a certain amount. The mentioned settings can be configured on the General tab of the counterparty property sheet, under B2B supplier:
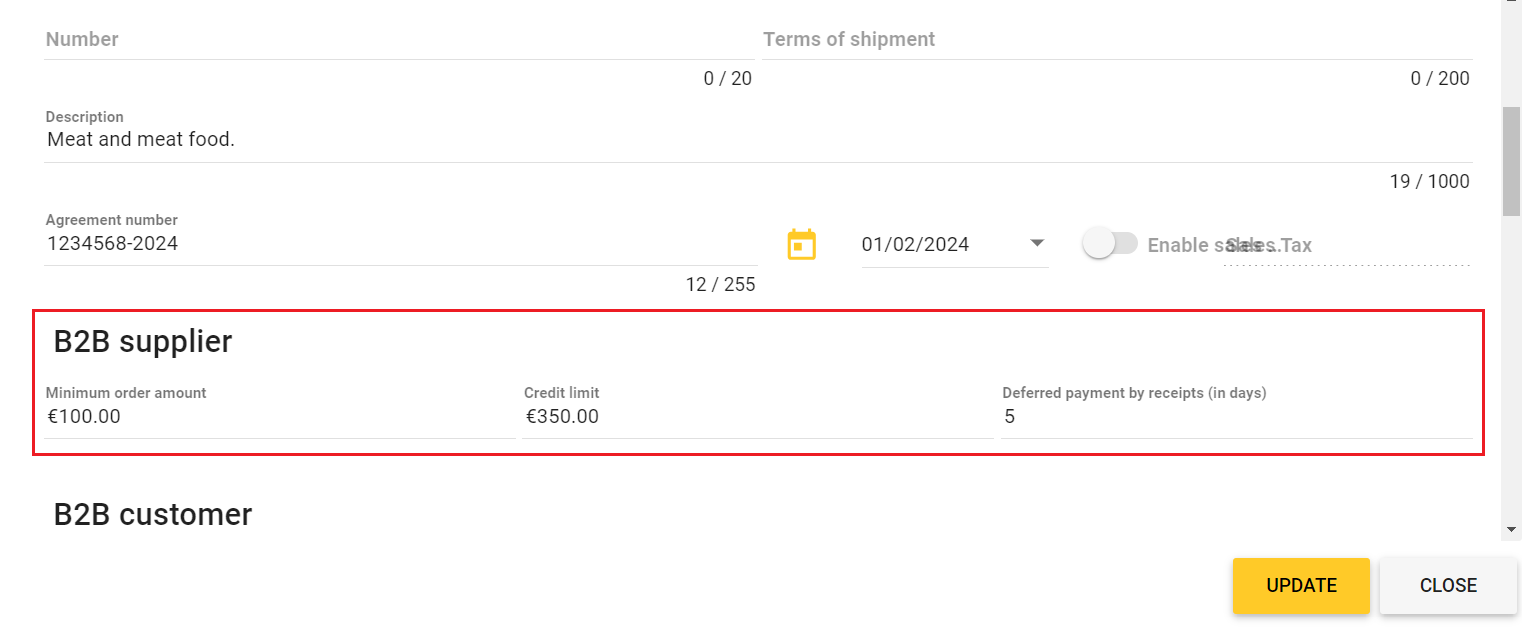
In this scenario, Meat Food company uses the following order processing settings:
- Minimum order amount: 100 EUR
- Credit limit: 350 EUR
- Deferred payment by receipts (in days): 5
How It Works
In the above scenario, the system does not allow you to save order for Meat Food company until the amount of the order reaches 100 EUR.
The system monitors total amount of all unpaid orders that concern Meat Food company. If that amount exceeds the specified credit limit (350 EUR in this scenario), you cannot place any order with the counterparty until the debt has been paid.
If you succeeded to create an order, you can create the Act of receiving for that order. The Act of receiving will contain the automatically generated date of the order payment. The order payment date is based on the order creation date and the Deferred payment by receipts (in days) parameter. For example, if the order creation date is September, 5, the system sets the order payment date to September, 10 because the Deferred payment by receipts parameter is set to 5 (days):

Duplicate an Order
To facilitate creation of new purchase order, you can clone an existing base order, and then make appropriate changes to the cloned order.
To duplicate an order
- Open a list of orders (see View a list of Purchase Orders).
- From the list, select a base order, and click Copy.
The system adds cloned order to the top of the purchase order list.
Delete Orders
Optionally, you can delete orders from the list.
To delete orders
- Open a list of orders (see View a list of Purchase Orders).
- From the list, select order(s) to delete.
- Click Delete.
NOTE: This operation permanently deletes selected orders from the orders history.
See also
- Adding and Writing-off Inventory Items
- Managing Vendors
 watch our help video: