You may allow the customers to place their orders using Mobile app or the store web site. In YumaPOS documents, we call orders of this type online orders. This topic explains how to arrange your work to process online orders.
NOTE: If your stores do not support online orders, you can skip this topic.
For processing online orders, perform the following mandatory steps that are detailed later in this topic:
- Select a mode for online orders processing.
- Set up a list of regions where your stores are situated.
Selecting a Mode for Online Orders Processing
If your stores support online orders, you should select a mode for online orders processing and the Main Store. You can specify those settings on the System Settings page. Complete the following steps:
- In the left navigation pane of the Back Office Management console, select Settings > System Settings.
- On the System Settings page, specify the Main Store and Web site and mobile app mode settings:

- Main Store: specifies the Main store.
NOTE: YumaPOS uses the Main Stores that you have specified for each region (see “Setting up a List of Regions for Your Stores” later in this topic). This parameter is required for Mode 2 and Mode 3. You can select any store from the list of registered stores. In future versions of Back Office, the Main Store field will be removed. - Web site and mobile application mode: specifies the order processing mode. You can select a mode from the provided list:
- Mode 1: Start from list of stores. Open store. Place order in this store.: This mode does not require you set the Main store. Mobile app or the store web site prompts a customer to select a store from the provided list. When the store is selected, the customer can place their order in that store.
- Mode 2: Start with items of Main Store. Placing order only into Main Store (call center).: In this mode, a customer can place their orders only in the Main store of their region. If you have defined several regions, Mobile app or the store web site first prompts the customer to select their region.
- Mode 3: Start with items of Main Store. Placing order basing on Delivery zone to store automatically. : In this mode, you must specify Main Store.
How it works?
After logging in to Mobile apps or the store web site, Back Office prompts a customer to select their region. After this, the customer is presented with the menu of the Main Store of the selected region.
If the customer makes a takeout order, they can select a store from which to take the order.
If the customer makes a delivery order, YumaPOS automatically assigns a store that belongs to the customer address delivery zone.Note: The Main store menu must be in sync with menus of all other stores!
Important: To use the Modes 2 and 3, you should specify the Region setting for all your stores. You can specify a store region in the store settings. For detailed information, see “Setting up a List of Regions for Your Stores” later in this topic.
Setting up a List of Regions for Your Stores
For processing online orders, you should set correctly the region of your store. First of all, you should create and save a list of regions. For each region, you should specify the Main Store.
To create a list of regions
- In the left pane of Back Office Management console, select Settings > Regions.
Click Add Region, complete the Add Region form, and then click Save:
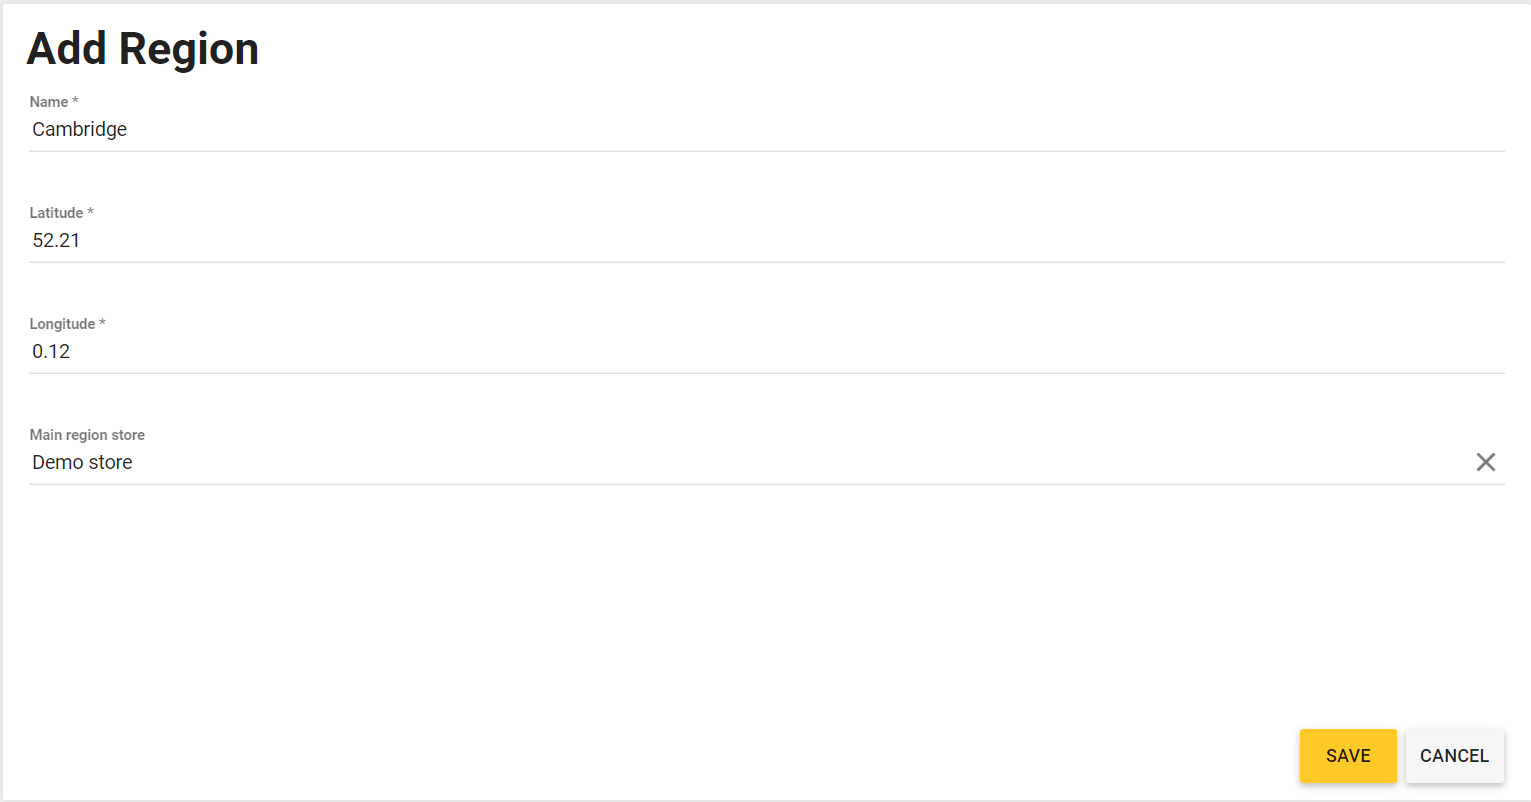
This form defines the following elements:
- Name: specifies the region name.
- Latitude, Longitude: specify the region latitude and longitude, respectively.
- Main region store: specifies the Main Store for that region.
Note: It is important to set accurate values of Latitude and Longitude. For each settlement, you can find this information in Google maps or similar platforms.
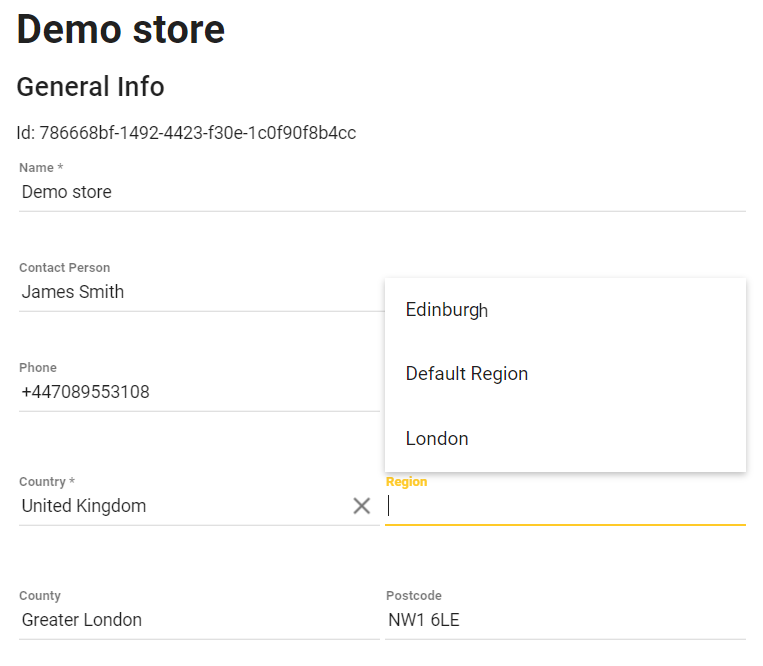
To set the store region
- In the left navigation pane of the Back Office Management console, select Settings > Stores, and then click the store name.
- From the Region list, select a region:
-
Important: You should specify the Region setting for each your store. For more information, see Advanced Parameters of Stores.